Blackview Tab 11, a good budget tablet

Blackview Tab 11 tablet with optional wireless keyboard.

Blackview Tab 11 tablet with optional wireless keyboard.

Last year a family member told me that her compact mobile phone’s screen is too small to show family photos properly to her friends. She said her friends use tablets to show their family’s photos, and she asked me if it would be possible to access her existing WhatsApp account via a tablet. I explained that, without guaranteed access to Wi-Fi in public areas, it would not be feasible to use WhatsApp Web on a tablet, so a tablet would need to have a SIM card. As the tablet’s SIM card would have a different phone number she would need a different WhatsApp account on the tablet but that account could be a member of the existing WhatsApp chat groups of which she is a member on her mobile phone. Additionally, she could forward to her tablet’s WhatsApp account any photos she receives in her mobile phone WhatsApp’s account.

Coincidentally, a few weeks later we changed our home Broadband provider (the previous provider’s service was terrible), and the new package included a mobile phone SIM card with 5 GB data monthly at a very cheap price. We already have good SIM-only packages for our mobile phones, so the new SIM card was available to be used in a tablet. Therefore I decided to buy a budget tablet, and plumped for a Blackview Tab 10, which had a good specification for a budget tablet. It came in September 2021 with Blackview firmware version Tab10_EEA_TP717_V1.0.0_20210429V07 containing some bugs: the System Manager app did not work after I inserted a 128 GB microSD card and the tablet’s microphone did not work in WhatsApp, Signal and Skype. I was able to fix the bugs by upgrading the tablet’s firmware to version Tab10_EEA_TP717_V1.0_20210824V09 with the help of Blackview’s customer support department. I assume a Tab 10 purchased since September 2021 would already have the newer firmware. Anyway, after upgrading the firmware everything works well. The tablet’s camera performance is not stellar, but who buys a tablet for its cameras? I would summarise the Blackview Tab 10’s features as follows:

  • It has 4 GB RAM and 64 GB storage.
  • It was supplied with a charger, USB C earphones (including microphone), OTG (on-the-go) adapter (USB C plug on one end, USB A socket on the other end), and a protective case which can be folded to make a kickstand.
  • It does not have a 3.5 mm jack socket for earphones, so you have to use earphones that have a USB C plug.
  • In the UK it works well to make and receive phone calls (4G), send and receive SMS messages (4G), and send and receive mobile data (4G). The SIM card for a mobile network that also supports 5G works with 4G too. I had to enter the APN (Access Point Name) parameters of my mobile service provider, which I found by googling.
  • According to Blackview the Tab 10’s mobile phone functionality does not work in the USA. only Europe and Asia.
  • It comes with Blackview’s Doke OS_P 1.0 using Android 11.
  • It has a bright, crisp screen, albeit without automatic brightness adjustment.
  • It can be connected to a magnetic keyboard designed for the Tab 10 (see Blackview’s online shop).
  • Wi-Fi and Bluetooth work well.
  • It is fine for browsing the Web, viewing photos, watching YouTube videos and other videos, reading documents, chatting via WhatsApp, Signal and Skype.
  • The tap detection is a little slow, but fine for normal use.

There is a very comprehensive review of the Tab 10 on the NOTEBOOKCHECK Web site.

By the way, since I bought the Tab 10 Blackview has released a Tab 10 Pro with 8 GB RAM and 128 GB storage, with handwriting support. The additional memory, storage and handwriting support make the Tab 10 Pro a better choice than the Tab 10 for an extra GBP 30 or so.

Anyway, the Tab 10 filled the brief I had been given.

This post would have ended here except that, last week, I noticed that the Tab 10’s screen had partially popped out of its plastic housing. I suspect one of my family had either dropped the tablet or sat on it on the sofa. When I tried to push the screen back into its housing a crack formed in a corner of the screen. The crack appears to be in the LCD screen under the touch screen. I asked a local repair shop how much they would charge to repair it and they quoted me nearly half what I paid for the tablet, so I decided to buy the latest Blackview tablet model instead, the Tab 11. The Tab 11 has a higher specification than the Tab 10 and I paid less for it than I paid for the Tab 10 (although the Tab 10 is now being discounted by Blackview and some online stores and can be purchased for less than the Tab 11).

Apart from the higher specification CPU and GPU than the Tab 10, the Tab 11 has double the RAM and double the storage. The Tab 11 housing is aluminium alloy rather than the plastic housing of the Tab 10, and it weighs less than the Tab 10. The NOTEBOOKCHECK Web site does not yet have a comprehensive review of the Tab 11, but the TECHXREVIEWS Web site has a fairly comprehensive review. The Tab 11 is noticeably snappier and responsive than the Tab 10 and I like it a lot so far. Unlike the Tab 10, the Tab 11 has a 3.5 mm socket for earphones with a 3.5 mm jack plug, which I prefer.

The Tab 11’s mobile phone functionality does not work in the USA, only Europe and Asia according to Blackview. I can confirm a UK SIM card works perfectly in the Tab 11 in the UK. The SIM card I am using supports the mobile provider’s 5G network but the Tab 11 supports up to 4G LTE, which works fine with the SIM card.

There is significant commonality between the Tab 11 and Tab 10 as they both use Android 11. The Tab 10 has Blackview’s Doke OS_P 1.0 on top of Android 11, whereas the Tab 11 has Doke OS_P 2.0 which has several additional features (split screen functionality, for example).

I have seen a YouTube video review that claims the Tab 11 does not support Widevine L1, despite Blackview’s specification for the Tab 11. I have not tested that feature as it is not something I am particularly interested in. However, I read Blackview’s blog post ‘How to enable or check out Widevine L1 Certification on Blackview Tab 11?‘ and I installed the third-party Android app ‘DRM Info‘ which indicated the Tab 11 supports Widevine L1, although that is as far as I have checked. I installed the BBC iPlayer app on the Tab 11, and programmes play perfectly; video looks great to my eyes, and audio is also excellent. YouTube videos also play well and sound great. I’m not interested in playing games, so cannot comment on that aspect, although the reviews of the Tab 11 I have watched on YouTube claim games performance is good.

I would summarise the Blackview Tab 11’s features as follows:

  • It has 8 GB RAM and 128 GB storage.
  • The housing is made of aluminium alloy and is strong and rigid.
  • The tablet weighs less than the Tab 10.
  • It was supplied with a charger, OTG (on-the-go) adapter (USB C plug on one end, USB A socket on the other end), and a protective case which can be folded to make a kickstand.
  • It has a 3.5 mm jack socket for earphones.
  • In the UK it works well to make and receive phone calls (4G), send and receive SMS messages (4G), and send and receive mobile data (4G). The SIM card for a mobile network that also supports 5G works with 4G too.
  • According to Blackview the Tab 11’s mobile phone functionality does not work in the USA. only Europe and Asia.
  • It comes with Blackview’s Doke OS_P 2.0 using Android 11.
  • It has a bright, crisp screen with automatic brightness adjustment (‘adaptive brightness’).
  • It can be connected to a wireless keyboard designed to work with the Tab 11 (see Blackview’s online shop).
  • Wi-Fi and Bluetooth work well.
  • It is good for browsing the Web, viewing photos, watching YouTube videos and other videos, reading documents, chatting via WhatsApp, Signal and Skype.
  • The tap detection is good, and response is snappy.
  • Audio is good.

In summary, if you’re in the market for a budget tablet, in my opinion the Blackview Tab 11 would be a good choice; I am very pleased with it. At the time of writing, Blackview’s online shop lists the Tab 11 at GBP 168.44 and the Tab 10 at GBP 145.47. Unless your budget is tight, I would forget the Tab 10; the Tab 11 is the way to go. If you want a tablet that supports a UK SIM card as well as Wi-Fi and Bluetooth, the Blackview Tab 10 and Tab 11 are good budget choices in the UK, although the Tab 11 is a much better choice if you can afford the extra GBP 25 or so. However, US residents should note that the tablets do not support mobile networks in the USA (Wi-Fi and Bluetooth work fine in any case). Blackview’s Web site states “This tablet’s 4G [mobile] network connection can only work in Europe and Asia area, please pay attention before purchasing or consult us.”

Using GeckoLinux to resurrect my old nettop

Clementine music player in GeckoLinux LXQt on my 43-inch TV screen

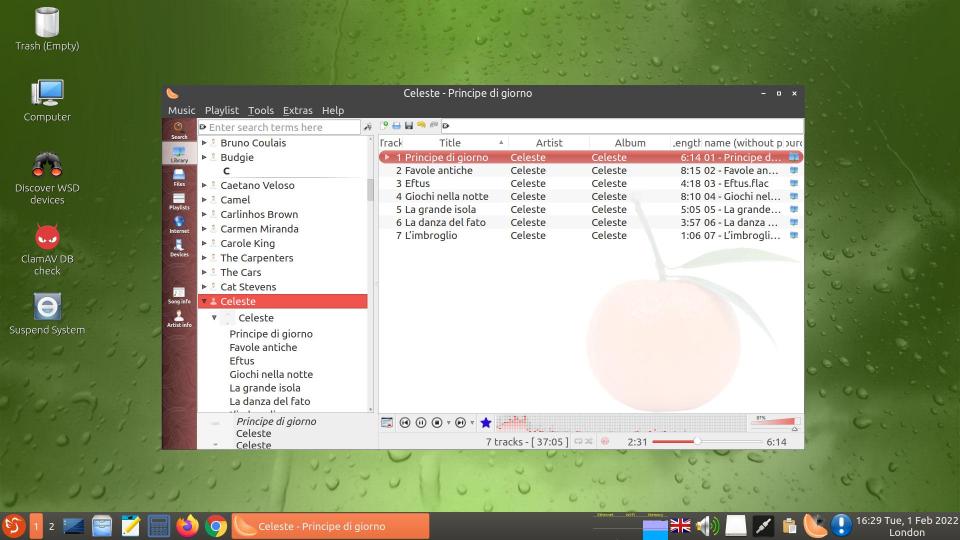
Clementine music player in GeckoLinux LXQt on my 43-inch TV screen.


Background/History

Back in early 2010, when nettops were the latest thing, I bought an ASRock ION 330HT nettop, billed as an ‘HTPC‘ (Home Theatre PC):

  • CPU: Intel Atom 330 1.6GHz (Dual core)
  • Memory: Supports DDR2 800MHz, 2 x SO-DIMM slots, default 2GB (2 x 1GB), maximum up to 4GB (due to the CPU limitation, the actual memory size available to the OS may be less than 4GB).
  • Chipset: NVIDIA ION graphics processor
  • Graphics: NVIDIA ION Graphics, supports DX10 / HD 1080p playback
  • Audio: 7.1 CH HD Audio with DTS
  • HDD: 320GB 2.5″ HDD, capable of supporting RAID 0 and 1 by adopting a second 2.5″ HDD
  • ODD: DVD Super Multi
  • LAN: Gigabit Ethernet
  • WLAN: 802.11b/g/n Wi-Fi
  • Rear I/O: 1 x HDMI, 1 x D-Sub VGA, 6 x USB 2.0, 1 x S/PDIF, 1 x powered eSATA/USB (For powered eSATA function, Hot Plug function is supported in RAID / AHCI mode only. IDE mode does not support Hot Plug function.)
  • Remote Controller: MCE remote controller
  • External Power Unit: 65W/19V adapter
  • Firmware: PC BIOS (no UEFI)

In 2010 so-called smart TVs were not really that smart. I still had a large Sony Trinitron TV with a CRT, and I wanted to see if I could use the nettop with it. I bought a DVB-T USB adapter to enable the nettop to access digital terrestrial television, and I installed XBMC (now called KODI). I installed the now-defunct Sabayon Linux, and had a hell of a job getting ASRock’s CIR [Windows] MCE (Media Center Edition) remote to work. ASRock only released a driver (lirc_wb677) for the Nuvoton w836x7hg CIR chip in the nettop for Ubuntu 9.10, 10.04 and 10.10, and I had to patch it to get it to work with LIRC in Sabayon Linux. Later that year developer Jarrod Wilson released the first version of a new driver named nuvoton-cir for the Nuvoton w836x7hg chip, and in 2011 I had another struggle to get that working with LIRC and XBMC in Sabayon Linux.

To be able to use the DVB-T USB adapter I installed Tvheadend in Sabayon Linux, which worked well, although the adapter needed to be connected to the house TV aerial in order to provide good reception, i.e. the small indoor aerial supplied with the DVB-T adapter was next to useless.

I bought a VGA-to-Composite Video converter to connect the nettop’s D-Sub VGA socket to the TV’s composite video input. The Linux Desktop displayed on the CRT TV screen was OK-ish but, as you would expect, not comparable to the display on a TFT monitor.

Basically, I was not satisfied with the result, and the nettop went back into its box after very little use. I did get it out briefly in 2016 to upgrade the 2GB RAM (two 1GB modules) to the maximum allowable 4GB (two 2GB modules) in case I might want to use the nettop in future. With two 2GB RAM modules the nettop detects 3327MB of RAM, which limits what can be done with it.

When ‘proper’ smart TVs came onto the market, there was no longer any incentive to use an HTPC; everything and more that a nettop HTPC did could be done by a smart TV. In 2015 I succumbed and bought an LG smart TV, added a USB 1TB HDD, connected my DVD player to the TV and forgot about the nettop. The LG TV developed a fault three years later. I fixed it but its lack of catch-up TV apps for some of the main TV stations became irritating so, three years ago, I bought a new TV. The media player on the TV (a FINLUX TV) cannot play FLAC music files, and the Web browser is very slow with a buggy UI, so I began thinking about resurrecting the ASRock nettop in order to be able to browse the Web properly on my TV and to play my music flles through the TV’s sound bar. I finally got around to doing this recently, so here is the story…
 
 
Connections

I have a Rii i8 mini wireless keyboard which I used with my smart TV, so I connected its lead with USB wireless receiver pigtail and micro-USB charging plug pigtail to one of the USB ports on the back of the nettop. The lead is long enough to enable the USB wireless receiver (about the size of a USB Type A plug) to sit between the sound bar and the TV stand. The micro-USB charging plug pigtail lies out of sight on the TV stand behind the sound bar, ready to charge the mini keyboard when needed. Excellent wireless mini keyboard with touchpad, by the way.

The nettop is connected to the TV by an HDMI cable. The sound bar is connected to the TV by a 3.5mm jack plug cable, and connected to the nettop by an S/PDIF (optical) cable. I use the sound bar’s remote to switch easily between TV audio and nettop audio.
 
 
Finding a suitable Linux distribution

Given the limitations of the nettop’s CPU and memory, I wanted to install a distribution with a lightweight Desktop Environment. I like LXQt, so that would have been my choice if possible. Gentoo Linux is installed on my laptops, and Lubuntu 21.04 on my family’s desktop. LXQt is available for Gentoo Linux but I would not dream of installing Gentoo Linux on a relatively slow nettop with less than 4GB accessible, but Lubuntu seemed a good candidate. Therefore I created a Live USB pendrive with Lubuntu 21.10, which booted fine on all my other machines (including a legacy machine with PC BIOS only, not UEFI) but would not boot on the ASRock nettop. It would get as far as the GRUB menu then stall. So I tried Mageia (the Xfce release, as there is no Live LXQt release), but the result was similar. So then I tried PCLinuxOS (also the Xfce release, as there is no Live LXQt release), and that did install and run nicely (although the edges of the file manager’s windows were thick dashed lines). Everything worked well until I selected Suspend and tried to Resume, which resulted in the following messages on the screen and the nettop hung:

[ 1774.594461] IRQ 26: no longer affine to CPU1
[ 1774.602213] IRQ 16: no longer affine to CPU3
[ 1774.602227] IRQ 18: no longer affine to CPU3
[ 1774.613499] TSC synchronization [CPU#0 -> CPU#1]:
[ 1774.613504] Measured 377387956 cycles TSC warp between CPUs, turning off TSC clock.
[ 1774.613552] TSC found unstable after boot, most likely due to broken BIOS. Use 'tsc=unstable'.
[ 1774.609000] clocksource: Checking clocksource tsc synchronization from CPU 1 to CPUs 0.
[ 1774.609000] clocksource:         CPUs 0 ahead of CPU 1 for clocksource tsc.
[ 1774.609000] clocksource:         CPU 1 check durations 6592ns - 6592ns for clocksource tsc.
_

I could get rid of the clock-related messages by adding ‘tsc=unstable‘ to the kernel boot line in /boot/grub/grub.cfg, but I could not get rid of the ‘no longer affine’ messages and the hanging every time the nettop resumed from suspension. I wondered if the BIOS was to blame, so I downloaded onto a FAT32-formatted USB pendrive the latest version (1.2) of the 330HT BIOS from the ASRock Web site and installed it on the nettop (easy: press F6 at boot), but the problem remained. I began to wonder it any modern Linux release would work on this nettop.

So it was time to try another distribution. My searches on DistroWatch showed that GeckoLinux (“a Linux spin based on the openSUSE distribution, with a focus on polish and out-of-the-box usability on the desktop” according to its Web site) has static and rolling editions based on openSUSE Leap and openSUSE Tumbleweed respectively, and has many Desktop Environment releases, including LXQt. The availability of LXQt attracted my attention, but I was also curious to try openSUSE and the Btrfs file system. I did try openSUSE briefly many years ago (possibly more than a decade), but I have never used Btrfs. So I decided it was worth a shot.

I downloaded the latest available ISO for GeckoLinux ROLLING LXQt and used dd on one of my Linux machines to create a bootable USB pendrive:

user $ sudo blkid # Find out which device is the pen drive
user $ sudo dd if=/home/fitzcarraldo/Downloads/GeckoLinux_ROLLING_LXQt.x86_64-999.220105.0.iso of=/dev/sdd bs=4M status=progress && sync

I booted the pendrive on the nettop and launched the GeckoLinux installer, which had no trouble installing the OS on the nettop’s HDD. Further on I point out a couple of minor niggles I found with the application menu but, by and large, I find GeckoLinux Rolling LXQt provides a good, polished user interface and experience.
 
 
Setting up auto login and disabling a lock screen

LXQt Desktop in GeckoLinux LXQt on my 43-inch TV screen

LXQt Desktop in GeckoLinux LXQt on my 43-inch TV screen.

I found that, in order to get auto login working correctly in the installation, I needed to specify a user password during installation and then set up auto login after booting into the new installation:

‘Application Menu’ > ‘Preferences’ > ‘YaST User and Group Management’

  1. Select the user and click on ‘Expert Options’
  2. Select ‘Login Settings’
  3. Tick ‘Auto Login’
  4. Tick ‘Passwordless Logins’

One needs to be a little careful not to end up with both light-locker and XScreenSaver providing lock screens. I wanted only a screensaver and no locking of the user session after a period of inactivity. Any press of a key or tap of the touchpad on my Rii i8 mini wireless keyboard will simply stop the screensaver animation and then display the Desktop.

‘Application Menu’ > ‘Preferences’ > ‘LXQt Settings’ > ‘Session Settings’

  1. In ‘Basic Settings’, untick ‘Lock screen before suspending/hibernating’.
  2. In ‘Autostart’, ‘XScreenSaver’ under ‘LXQt Autostart’ needs to be ticked.

‘Application Menu’ > ‘Preferences’ > ‘Screensaver’

If a window appears informing you that the XScreenSaver daemon is not running and offering to launch it, click ‘OK’.

  1. Select ‘Mode: Only One Screen Saver’.
  2. Select a screensaver animation (I use ‘GL Matrix’).

‘Application Menu’ > ‘System Tools’ > ‘dconf Editor’

Configure the following settings for light-locker:

idle-hint false
late-locking false
lock-after-screensaver 0
lock-on-lid false
lock-on-suspend false

‘Application Menu’ > ‘Preferences’ > ‘LXQt Settings’ > ‘Power Management’

Untick ‘Enable Battery Watcher’, ‘Enable Lid Watcher’ and ‘Enable Idleness Watcher’ on the respective tabs.
 
 
Setting the hostname

I set a static hostname (I opted for ‘ion330ht’) by selecting ‘Application Menu’ > ‘Preferences’ > ‘YaST Network’ and entering the hostname on the ‘Hostname/DNS’ tab.
 
 
Package Management

Both the YaST Software Management GUI and the zypper command are new to me, so I still have a lot to learn.

The main package repositories were already added, but to learn how to add other repositories manually see the following articles:

Anyway, these are the repositories currently in use on this nettop:

ion330ht:/home/fitzcarraldo # zypper repos
Repository priorities in effect:                                      (See 'zypper lr -P' for details)
      90 (raised priority)  :  1 repository
      97 (raised priority)  :  1 repository
      98 (raised priority)  :  2 repositories
      99 (default priority) :  4 repositories
     115 (lowered priority) :  4 repositories

#  | Alias                                | Name                   | Enabled | GPG Check | Refresh
---+--------------------------------------+------------------------+---------+-----------+--------
 1 | Google-chrome                        | Google-chrome          | Yes     | (r ) Yes  | Yes
 2 | Google-talkplugin                    | Google-talkplugin      | Yes     | (r ) Yes  | Yes
 3 | Nvidia                               | Nvidia                 | Yes     | (r ) Yes  | Yes
 4 | Packman_Tumbleweed                   | Packman_Tumbleweed     | Yes     | (r ) Yes  | Yes
 5 | Tumbleweed_OSS                       | Tumbleweed_OSS         | Yes     | (r ) Yes  | Yes
 6 | Tumbleweed_OSS-updates               | Tumbleweed_OSS-updates | Yes     | (r ) Yes  | Yes
 7 | Tumbleweed_non-OSS                   | Tumbleweed_non-OSS     | Yes     | (r ) Yes  | Yes
 8 | http-download.opensuse.org-f6f93dd3  | openSUSE:Tumbleweed    | Yes     | (r ) Yes  | Yes
 9 | http-opensuse-guide.org-a78c9b99     | libdvdcss repository   | Yes     | (r ) Yes  | Yes
10 | https-download.opensuse.org-96367b31 | network:im:signal      | Yes     | (r ) Yes  | Yes
11 | https-download.opensuse.org-a5f414ff | openSUSE:Tumbleweed    | Yes     | (r ) Yes  | Yes
12 | skype-stable                         | Skype-stable           | Yes     | (  ) No   | Yes

Repositories 8 to 11 in the above list were added when I used ‘1 Cick Install’ on an openSUSE Software Web page for a specific package.

Most of what I needed was already installed, and I installed a few other packages using either the YaST Software Management GUI, the zypper command or ‘1 Click Install’:

● To be able to use the locate command to search for specific files:

   mlocate

● To be able to configure the LXQt Keyboard State Indicator on the Panel to display the flag of the keyboard language:

   iso-country-flags-png

● I was not sure if online updates would be advisable, but it looked potentially useful:

   yast2-online-update-configuration

● Some Web sites are not displayed correctly in Firefox, and I use Google’s Chrome browser for those:

   google-chrome-stable

● The Clementine music player (already installed) has the ability to display visualisations using projectM:

   projectM
   projectM-data

However, I could not get projectM to load its visualisation files, but I need to tinker more with it.

● I wanted to implement my scheme to scan automatically any files downloaded into the ~/Downloads/ directory (see my 2017 post), so I installed the following packages:

   clamav
   kdialog
   inotify-tools
   acl

(See further down for the addtional steps I took in order to get my scheme to work in GeckoLinux/openSUSE.)

● A GUI front-end to ClamAV in case I wanted to scan any files or directories manually:

   clamtk

● Although not essential, I installed the package monitoring-plugins-clamav in case I wanted to use it to check if the virus signatures are current, although my Bash script in a 2021 post serves the same purpose.

● To provide the commands dig, host and nslookup in case I need them in future:

   bind-utils

● To provide the man command and pages from the Linux Documentation Project:

   man-pages
   man

● To enable me to specify the window colour and size etc. in xterm, if I wish:

   xtermset

● To provide a GUI utility to show the amount of used and unused space in each partition:

   filelight

● Various multimedia codecs were already installed, but I had to install the package libdvdcss2 in order to be able to play commercial DVDs, as VLC would not play them. I installed it by using ‘1 Click Install’:

https://software.opensuse.org/package/libdvdcss2

● I use Signal Messenger, so I installed the package signal-messenger by using ‘1 Click Install’:

https://software.opensuse.org/package/signal-desktop

However, a subsequent rolling update flagged a dependency conflict requiring it to be uninstalled.

● To enable machines running Windows to browse SMB shares in File Explorer I installed the WS-Discovery daemon:

   wsdd

● To be able to edit tags in my music files:

   kid3-qt

● To be able to copy characters not available on the keyboard:

   kcharselect

● To install ir-keytable, *.toml files and 70-infrared.rules so that I could try to get the ASRock CIR MCE remote working using the in-kernel support for IR decoders, instead of LIRC:

   v4l-utils

● I no longer use KODI but I wanted to see if I could get the ASRock CIR MCE remote to control it using the in-kernel support for IR decoders instead of LIRC:

   kodi

● I prefer SMPlayer to VLC (which came installed in GeckoLinux Rolling LXQt):

   smplayer

● To be able to edit .mkv files, e.g. to change the default audio language etc.:

   mkvtoolnix
   mkvtoolnix-gui
 
 
Web Service Discovery host daemon (wsdd)

Having installed the package wsdd by using ‘Preferences’ > ‘YaST Software Management’ I performed the following steps as root user:

ion330ht:/home/fitzcarraldo # systemctl enable wsdd

I edited /etc/systemd/system/multi-user.target.wants/wsdd.service and added ‘--workgroup=HOME‘ to the ExecStart line, as my Windows workgroup is HOME rather than WORKGROUP:

ExecStart=/usr/sbin/wsdd --shortlog --workgroup=HOME -c /run/wsdd $WSDD_ARGS

ion330ht:/home/fitzcarraldo # systemctl daemon-reload
ion330ht:/home/fitzcarraldo # systemctl start wsdd

Although not necessary (and nothing to do with wsdd on the nettop), I performed the steps given in my 2020 blog post ‘A Linux command-line utility to discover and list WSD-enabled computers and printers on a home network‘. Works a treat.
 
 
SMB

This SMB configuration is for my home network that uses Broadcast NetBIOS Name Resolution, SMB and WS-Discovery. See the following posts (and all the comments on each, some of which contain important updates) for an explanation of how I set these up, making it relatively straightforward to add a device that uses the SMB protocol and enable it to browse shares on the other machines, and vice versa.

Note also that the smb, nmb and wsdd services must be running (see the next section).

I used the command ‘ip address‘ to find out the names of the wired and wireless interfaces, then I edited the file /etc/samba/smb.conf to contain the following (the Workgroup name in my home network is ‘HOME’ rather than the usual default of ‘WORKGROUP’):

[global]
;no need to specify 'smb ports' as ports 139 & 445 used by default
workgroup = HOME
netbios name = ion330ht
case sensitive = no
browseable = yes

;If this machine becomes a Master Browser, the following parameter allows it to hold the browse list
browse list = yes

printcap name = cups
printing = cups

log file = /var/log/samba/log.%m
max log size = 50

security = user
map to guest = bad user

encrypt passwords = yes
passdb backend = tdbsam

domain master = no
local master = yes
preferred master = yes
name resolve order = bcast
dns proxy = no

;Listen for NetBIOS on Ethernet and Wireless interfaces
;Names of the interfaces found using ifconfig command
interfaces = enp0s10 wlp2s0
server string = Samba Server on ion330ht
log level = 2

[netlogon]
comment = Network Logon Service
path = /var/lib/samba/netlogon
guest ok = yes

[printers]
comment = All Printers
path = /var/spool/samba
guest ok = yes
printable = yes
create mask = 0700

[print$]
path = /var/lib/samba/printers
write list = @adm root
guest ok = yes

[fitzcarraldo]
path = /home/fitzcarraldo/Public-fitzcarraldo
comment = To pass files to and from ion330ht
browseable = yes
public = yes
writable = yes
valid users = fitzcarraldo

I used the command ‘smbpasswd -a fitzcarraldo‘ to specify my SMB password, which has to be the same as my Linux password.
 
 
Starting Services

‘Application Menu’ > ‘Preferences’ > ‘YaST Services Manager’

In addition to any services already configured to start ‘On Boot’, make sure the following are set to start ‘On Boot’:

  • clamd
  • cups
  • nmb
  • ntpd
  • smb
  • wsdd


User’s Locale

Even though I had configured during installation (and confirmed after installation using YaST) the language, keyboard language and location as British English and Europe/London respectively, the dates of files displayed by PCManFM-Qt were still in US format. I added the following lines to the file ~/.profile to fix that:

export LANG="en_GB.UTF-8"
export LC_CTYPE="en_GB.UTF-8"
export LC_NUMERIC="en_GB.UTF-8"
export LC_TIME="en_GB.UTF-8"
export LC_COLLATE="en_GB.UTF-8"
export LC_MONETARY="en_GB.UTF-8"
export LC_MESSAGES="en_GB.UTF-8"
export LC_PAPER="en_GB.UTF-8"
export LC_NAME="en_GB.UTF-8"
export LC_ADDRESS="en_GB.UTF-8"
export LC_TELEPHONE="en_GB.UTF-8"
export LC_MEASUREMENT="en_GB.UTF-8"
export LC_IDENTIFICATION="en_GB.UTF-8"
export LC_ALL=""

Susequently I discovered that the file /etc/sysconfig/language contains variables that I probably could have edited manually to achieve the same thing for users’ accounts.
 
 
GUI Appearance

As I am sitting on a sofa viewing the TV screen from a distance, text and icons have to be larger than on a normal desktop or laptop machine. This was easy enough to configure.

I right-clicked on the LXQt Panel and selected ‘Configure Panel’ to increase the height of the Panel and the size of the Panel icons and Panel font. I selected ‘Preferences’ > ‘LXQt Settings’ > ‘Appearance’ to increase the size of the icons and font in the rest of the UI, to change the icon theme to Oxygen, and to change the mouse cursor size to 50. I selected ‘Preferences’ > ‘LXQt Settings’ > ‘Desktop’ (or right-click on the Desktop and select ‘Desktop Preferences’) to increase the icon size and font size on the Desktop.

I increased the font size of the Firefox address bar, bookmarks toolbar, tabs and page using the two methods (devp and userChrome.css) described on the following Mozilla Support page: Text size of menus and tool bars way too small. I want to be able to increase the size.

Firefox font size on my 43-inch TV screen

Firefox font size on my 43-inch TV screen.


ClamAV virus signatures database was not being updated

The ClamAV signatures database was not being updated automatically after I installed ClamAV, so I needed to fix that.

Using the following commands listed on the openSUSE Wiki page for ClamAV did not work, because there is no freshclam.service file:

fitzcarraldo@ion330ht:~> sudo systemctl start freshclam
fitzcarraldo@ion330ht:~> sudo systemctl enable freshclam

I suspected that GeckoLinux/openSUSE Tumbleweed uses systemd timers instead of cron, and indeed I found a timer file for freshclam:

fitzcarraldo@ion330ht:~> locate timer | grep fresh
/usr/lib/systemd/system/freshclam.timer
fitzcarraldo@ion330ht:~> cat /usr/lib/systemd/system/freshclam.timer
[Unit]
Description=Timer for freshclam virus definitions downloader

[Timer]
OnBootSec=5m
OnUnitActiveSec=2h
Persistent=true

[Install]
WantedBy=timers.target

I enabled it as follows:

fitzcarraldo@ion330ht:~> sudo systemctl enable freshclam.timer
[sudo] password for root: 
Created symlink /etc/systemd/system/timers.target.wants/freshclam.timer → /usr/lib/systemd/system/freshclam.timer.
fitzcarraldo@ion330ht:~> sudo systemctl start freshclam.timer
fitzcarraldo@ion330ht:~> sudo systemctl is-active freshclam.timer
active

systemd now runs freshclam 5 minutes after the machine boots and every 2 hours thereafter.
 
 
Automatic scanning for viruses in the Downloads directory

See my 2017 blog post Using the ClamAV daemon to scan files placed in my Downloads directory in Gentoo Linux, which I have implemented successfully on machines running Gentoo Linux and Lubuntu. However, in GeckoLinux it took a bit more effort to get the scheme working.

GeckoLinux Rolling (and, I assume, also openSUSE Tumbleweed) allocates clamav to a user named ‘vscan‘ and a group named ‘vscan‘ instead of a user named ‘clamav‘ and a group named ‘clamav‘.

fitzcarraldo@ion330ht:~> ls -la /var/lib/clamav
total 343504
drwxr-xr-x 1 vscan vscan        84 Jan 14 20:27 .
drwxr-xr-x 1 root  root        534 Jan 11 12:08 ..
-rw-r--r-- 1 vscan vscan    293670 Jan 11 12:36 bytecode.cvd
-rw-r--r-- 1 vscan vscan 180965376 Jan 14 10:29 daily.cld
-rw-r--r-- 1 vscan vscan        69 Jan 11 12:33 freshclam.dat
-rw-r--r-- 1 vscan vscan 170479789 Jan 11 12:35 main.cvd

Why GeckoLinux (and, I assume, openSUSE) is different from Gentoo Linux and *buntu I don’t know, but I wish Linux distributions were consistent in such cases.

This test command did not work:

fitzcarraldo@ion330ht:~> clamdscan --fdpass --move=/home/fitzcarraldo/virus-quarantine /home/fitzcarraldo/eicarcom2.zip
WARNING: Ignoring deprecated option AllowSupplementaryGroups at /etc/clamd.conf:790
/home/fitzcarraldo/eicarcom2.zip: File path check failure: Permission denied. ERROR

----------- SCAN SUMMARY -----------
Infected files: 0
Total errors: 2
Time: 0.003 sec (0 m 0 s)
Start Date: 2022:01:14 20:36:05
End Date:   2022:01:14 20:36:05

Anyway, this is what I did (I am not sure precisely which command or commands below were necessary to get things working):

fitzcarraldo@ion330ht:~> setfacl -Rd -m 'u:vscan:rx' /home/fitzcarraldo
fitzcarraldo@ion330ht:~> sudo setfacl -Rd -m 'u:vscan:rx' /home/fitzcarraldo
fitzcarraldo@ion330ht:~> sudo usermod -a -G fitzcarraldo vscan
fitzcarraldo@ion330ht:~> sudo usermod -a -G vscan fitzcarraldo
fitzcarraldo@ion330ht:~> groups
fitzcarraldo vscan users video lp audio network storage wheel autologin
fitzcarraldo@ion330ht:~> sudo reboot

(This was the reason I installed the package acl I mentioned earlier.)

After the above changes, this test command does work:

fitzcarraldo@ion330ht:~> clamdscan --fdpass --move=/home/fitzcarraldo/virus-quarantine /home/fitzcarraldo/eicarcom2.zip
WARNING: Ignoring deprecated option AllowSupplementaryGroups at /etc/clamd.conf:790
/home/fitzcarraldo/eicarcom2.zip: Win.Test.EICAR_HDB-1 FOUND
/home/fitzcarraldo/eicarcom2.zip: moved to '/home/fitzcarraldo/virus-quarantine/eicarcom2.zip'

----------- SCAN SUMMARY -----------
Infected files: 1
Time: 0.020 sec (0 m 0 s)
Start Date: 2022:01:14 20:41:27
End Date:   2022:01:14 20:41:27

Also the scheme described in my aforementioned 2017 post now works in this installation.
 
 
Corrupted filesystem

Not long after I installed GeckoLinux I left the nettop running unattended on several occasions, and a couple of times I returned to find the HDD clicking rapidly (I assume this was the noise of the head continually seeking unsuccessfully), and had to press the machine’s Power switch in order to stop this. As the nettop had been used very little and was in almost new condition, I suspected that the problem was not caused by the HDD but rather by the software installation. I have read about corruption of Btrfs filesystems on several occasions in the past, so I wondered if the problem was caused by Btrfs itself.

I booted the Live pendrive that I had used to install GeckoLinux Rolling LXQt, became the root user (‘sudo su‘) and entered the command ‘btrfs check /dev/sda1‘, which returned no errors. I did some searching on the Web and came across commands such as ‘btrfs check --repair‘ which appeared to be analagous to ‘fsck‘ for other filesystems. It was only later that I found an article ‘How to recover a BTRFS partition‘ with a dire warning about only using that command as a last resort. Before finding that article I ran the following commands:

localhost:/home/linux # btrfs rescue zero-log /dev/sda1
Clearing log on /dev/sda1, previous log_root 0, level 0
localhost:/home/linux # btrfs check --repair /dev/sda1
enabling repair mode
WARNING:

        Do not use --repair unless you are advised to do so by a developer
        or an experienced user, and then only after having accepted that no
        fsck can successfully repair all types of filesystem corruption. Eg.
        some software or hardware bugs can fatally damage a volume.
        The operation will start in 10 seconds.
        Use Ctrl-C to stop it.
10 9 8 7 6 5 4 3 2 1
Starting repair.
Opening filesystem to check...
Checking filesystem on /dev/sda1
UUID: 82a56d4a-a234-4543-8596-99d98b84c581
ERROR: Corrupted fs, no valid METADATA block group found

Darn it! I tried the following command to see if it returned an error message:

localhost:/home/linux # btrfs rescue zero-log /dev/sda1
Clearing log on /dev/sda1, previous log_root 0, level 0

Then I found the aforementioned article ‘How to recover a BTRFS partition’ and entered the following command which the article states can be used to rebuild the filesystem metadata tree:

localhost:/home/linux # btrfs rescue chunk-recover /dev/sda1/

It was very slow, occasionally displaying lines ‘Scanning: <n> in dev0‘, so I didn’t hang around to wait for it to complete. When I came back several hours later I found that it had finished and was displaying the final lines of output in the terminal window:

[...]
Scanning: 14673166336 in dev0
Scanning: 14742372352 in dev0
Scanning: 14813675520 in dev0
Scanning: 14884454400 in dev0
Scanning: 14954708992 in dev0
Scanning: 15025487872 in dev0
Scanning: 15094693888 in dev0
Scanning: 15143624704 in dev0
Scanning: 15213707264 in dev0
Scanning: 15284486144 in dev0
Scanning: DONE in dev0
Check chunks successfully with no orphans
Chunk tree recovered successfully

I then ran the ‘rescue zero-log‘ and ‘check‘ commands again to see if there would be an error message:

localhost:/home/linux # btrfs rescue zero-log /dev/sda1
Clearing log on /dev/sda1, previous log_root 0, level 0
localhost:/home/linux # btrfs check /dev/sda1
Opening filesystem to check...
Checking filesystem on /dev/sda1
UUID: 82a56d4a-a234-4543-8596-99d98b84c581
[1/7] checking root items
Fixed 0 roots.
[2/7] checking extents
No device size related problem found
[3/7] checking free space tree
[4/7] checking fs roots
[5/7] checking only csums items (without verifying data)
[6/7] checking root refs
[7/7] checking quota groups skipped (not enabled on this FS)
found 159583424512 bytes used, no error found
total csum bytes: 155206908
total tree bytes: 614842368
total fs tree bytes: 389431296
total extent tree bytes: 28753920
btree space waste bytes: 131658663
file data blocks allocated: 188270157824
 referenced 182537080832

I hoped the filesystem had indeed been repaired. I then rebooted the machine from the HDD and it has been fine ever since.
 
 
Minor bug in the applications menu entry YaST Filesystem Snapshots

Preferences menu in GeckoLinux LXQt on my 43-inch TV screen

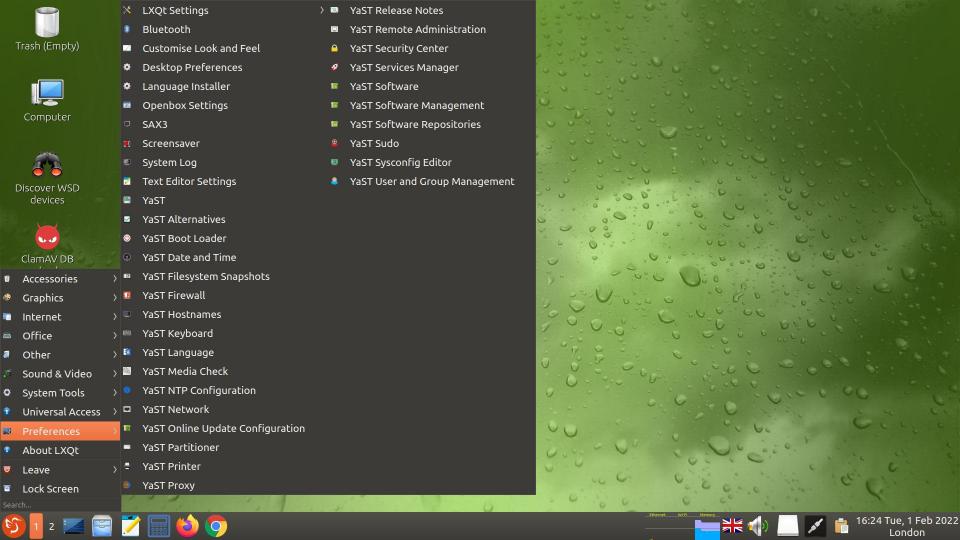
Preferences menu in GeckoLinux LXQt on my 43-inch TV screen.

The entry ‘Preferences’ > ‘YaST Filesystem Snapshots’ in the LXQt Application Menu would not launch Snapper (there was not even an authentication prompt to enter the root user’s password). All the other menu entries under ‘Preferences’ worked as expected. What made this more perplexing was that ‘Filesystem Snapshots’ in the ‘Miscellaneous’ section of the YaST Control Centre (‘Preferences’ > ‘YaST’ in the LXQt application menu) did launch Snapper, and I believe that selection also uses the desktop configuration file /usr/share/applications/YaST2/org.opensuse.yast.Snapper.desktop).

To check if there was something wrong with the desktop configuration file I copied /usr/share/applications/YaST2/org.opensuse.yast.Snapper.desktop to the Desktop, changed its ownership to fitzcarraldo.fitzcarraldo, right-clicked on it and selected ‘Trust this executable’, and it worked as expected when I double-clicked on it. So why did it not work when selected from the application menu?

I then compared the Snapper desktop file to the other YaST2 desktop files in the directory:

ion330ht:/home/fitzcarraldo # grep Exec /usr/share/applications/YaST2/org.opensuse.yast*
/usr/share/applications/YaST2/org.opensuse.yast.Alternatives.desktop:Exec=/usr/bin/xdg-su -c "/sbin/yast2 alternatives"
/usr/share/applications/YaST2/org.opensuse.yast.Bootloader.desktop:Exec=xdg-su -c "/sbin/yast2 bootloader"
/usr/share/applications/YaST2/org.opensuse.yast.CheckMedia.desktop:Exec=/sbin/yast2 checkmedia
/usr/share/applications/YaST2/org.opensuse.yast.Disk.desktop:Exec=xdg-su -c "/sbin/yast2 partitioner"
/usr/share/applications/YaST2/org.opensuse.yast.Firewall.desktop:Exec=xdg-su -c "/sbin/yast2 firewall"
/usr/share/applications/YaST2/org.opensuse.yast.Host.desktop:Exec=xdg-su -c "/sbin/yast2 host"
/usr/share/applications/YaST2/org.opensuse.yast.Installation.desktop:Exec=/bin/true
/usr/share/applications/YaST2/org.opensuse.yast.Keyboard.desktop:Exec=xdg-su -c "/sbin/yast2 keyboard"
/usr/share/applications/YaST2/org.opensuse.yast.LAN.desktop:Exec=xdg-su -c "/sbin/yast2 lan"
/usr/share/applications/YaST2/org.opensuse.yast.Language.desktop:Exec=xdg-su -c "/sbin/yast2 language"
/usr/share/applications/YaST2/org.opensuse.yast.NTPClient.desktop:Exec=xdg-su -c "/sbin/yast2 ntp-client"
/usr/share/applications/YaST2/org.opensuse.yast.OnlineUpdateConfiguration.desktop:Exec=/sbin/yast2 online_update_configuration
/usr/share/applications/YaST2/org.opensuse.yast.Printer.desktop:Exec=xdg-su -c "/sbin/yast2 printer"
/usr/share/applications/YaST2/org.opensuse.yast.Proxy.desktop:Exec=xdg-su -c "/sbin/yast2 proxy"
/usr/share/applications/YaST2/org.opensuse.yast.ReleaseNotes.desktop:Exec=/sbin/yast2 inst_release_notes
/usr/share/applications/YaST2/org.opensuse.yast.Remote.desktop:Exec=xdg-su -c "/sbin/yast2 remote"
/usr/share/applications/YaST2/org.opensuse.yast.Security.desktop:Exec=xdg-su -c "/sbin/yast2 security"
/usr/share/applications/YaST2/org.opensuse.yast.ServicesManager.desktop:Exec=xdg-su -c "/sbin/yast2 services-manager"
/usr/share/applications/YaST2/org.opensuse.yast.Snapper.desktop:Exec=/usr/bin/xdg-su -c '/sbin/yast2 snapper'
/usr/share/applications/YaST2/org.opensuse.yast.Sudo.desktop:Exec=xdg-su -c "/sbin/yast2 sudo"
/usr/share/applications/YaST2/org.opensuse.yast.SWSingle.desktop:Exec=xdg-su -c "/sbin/yast2 sw_single"
/usr/share/applications/YaST2/org.opensuse.yast.SWSource.desktop:Exec=xdg-su -c "/sbin/yast2 repositories"
/usr/share/applications/YaST2/org.opensuse.yast.Sysconfig.desktop:Exec=xdg-su -c "/sbin/yast2 sysconfig"
/usr/share/applications/YaST2/org.opensuse.yast.Timezone.desktop:Exec=xdg-su -c "/sbin/yast2 timezone"
/usr/share/applications/YaST2/org.opensuse.yast.Upgrade.desktop:Exec=/bin/true
/usr/share/applications/YaST2/org.opensuse.yast.Users.desktop:Exec=xdg-su -c "/sbin/yast2 users"

To get the LXQt application menu item ‘Preferences’ > ‘YaST Filesystem Snapshots’ to work I had to do the following:

1. Edit /usr/share/applications/YaST2/org.opensuse.yast.Snapper.desktop and change the following line:

Exec=/usr/bin/xdg-su -c '/sbin/yast2 snapper'

to:

Exec=xdg-su -c "/sbin/yast2 snapper"

2. Run the following command (as root user):

ion330ht:/home/fitzcarraldo # update-desktop-database /usr/share/applications

The file org.opensuse.yast.Alternatives.desktop contains Exec=/usr/bin/xdg-su -c "/sbin/yast2 alternatives" and works, and xdg-su is indeed in the directory /usr/bin/, so I don’t know why the original Snapper desktop file would not work from the LXQt application menu. Anyway, the modified file works, although I could have done without wasting several hours trying to fix the problem, even though it was an inconvenience rather than a show-stopper.
 
 
Applications Menu entries for YaST

I personally found the large number of YaST entries in the Application Menu confusing and unecessary (see the screenshots above and below). It also looks cluttered. The individual YaST entries can also be accessed via ‘Preferences’ > ‘YaST Control Center’, so a shorter menu could have been implemented instead. Also, the three entries ‘Other’ > ‘YaST Software’, ‘Preferences’ > ‘YaST Software’ and ‘Preferences’ > ‘YaST Software Management’ all do the same thing.

Other menu in GeckoLinux LXQt on my 43-inch TV screen

Other menu in GeckoLinux LXQt on my 43-inch TV screen.


ASRock CIR MCE Remote

I should point out that I tinkered with the infrared remote to scratch an itch, because the Rii i8 mini wireless keyboard with touchpad is far superior to a CIR MCE remote and can be used to control the Desktop Environment and any application, including KODI, with ease. MCE remotes are a pain in the neck to configure. The KODI Wiki states: “MCE Remotes – Infrared remote controls made for computers that follow the MCE standard. These remotes should work with Kodi out-of-the-box on Windows and Linux.” Good luck with that!

Anyway, the following are useful background reading on configuring Linux to use infrared remotes:

Here is what I had to do to configure GeckoLinux to recognise the ASRock MCE remote:

1. Ensure the IR receiver is enabled in the ASRock ION 330HT BIOS.

2. Do not install lirc. If it is installed, uninstall it and any associated LIRC packages (except liblirc_client0 which is a dependency of vlc in GeckoLinux/openSUSE, unless you don’t want VLC).

3. The nuvoton-cir module should be loaded automatically at boot if the IR receiver is enabled in the BIOS:

ion330ht:/home/fitzcarraldo # lsmod | grep nuvoton
nuvoton_cir            32768  0
rc_core                65536  6 ir_rc6_decoder,rc_rc6_mce,cec,ir_rc5_decoder,nuvoton_cir
ion330ht:/home/fitzcarraldo # lsmod | grep lirc
ion330ht:/home/fitzcarraldo #

4. Install the package v4l-utils to install the ir-keytable utility, the files /etc/rc_maps.cfg, /lib/udev/rc_keymaps/*.toml and /usr/lib/udev/rules.d/70-infrared.rules

5. Enter the command ‘ir-keytable‘ and you should see some output similar to the following:

ion330ht:/home/fitzcarraldo # ir-keytable
Found /sys/class/rc/rc0/ with:
        Name: Nuvoton w836x7hg Infrared Remote Transceiver
        Driver: nuvoton-cir
        Default keymap: rc-rc6-mce
        Input device: /dev/input/event6
        LIRC device: /dev/lirc0
        Supported kernel protocols: lirc rc-5 rc-5-sz jvc sony nec sanyo mce_kbd rc-6 sharp xmp imon rc-mm 
        Enabled kernel protocols: lirc rc-6 
        bus: 25, vendor/product: 1050:00b4, version: 0x0073
        Repeat delay = 500 ms, repeat period = 125 ms

6. Enter the command ‘ir-keytable -t‘ and press some keys on the remote. You should see something like the following:

ion330ht:/home/fitzcarraldo # ir-keytable -t
Testing events. Please, press CTRL-C to abort.
297.938077: lirc protocol(rc6_mce): scancode = 0x800f0401
297.938119: event type EV_MSC(0x04): scancode = 0x800f0401
297.938119: event type EV_KEY(0x01) key_down: KEY_NUMERIC_1(0x0201)
297.938119: event type EV_SYN(0x00).
298.154989: event type EV_KEY(0x01) key_up: KEY_NUMERIC_1(0x0201)
298.154989: event type EV_SYN(0x00).
301.628475: lirc protocol(rc6_mce): scancode = 0x800f0402 toggle=1
301.628516: event type EV_MSC(0x04): scancode = 0x800f0402
301.628516: event type EV_KEY(0x01) key_down: KEY_NUMERIC_2(0x0202)
301.628516: event type EV_SYN(0x00).
301.846981: event type EV_KEY(0x01) key_up: KEY_NUMERIC_2(0x0202)
301.846981: event type EV_SYN(0x00).
307.577177: lirc protocol(rc6_mce): scancode = 0x800f0422
307.577219: event type EV_MSC(0x04): scancode = 0x800f0422
307.577219: event type EV_KEY(0x01) key_down: KEY_OK(0x0160)
307.577219: event type EV_SYN(0x00).
307.725639: lirc protocol(rc6_mce): scancode = 0x800f0422
307.725671: event type EV_MSC(0x04): scancode = 0x800f0422
307.725671: event type EV_SYN(0x00).
307.943009: event type EV_KEY(0x01) key_up: KEY_OK(0x0160)
307.943009: event type EV_SYN(0x00).
311.272866: lirc protocol(rc6_mce): scancode = 0x800f040d toggle=1
311.272930: event type EV_MSC(0x04): scancode = 0x800f040d
311.272930: event type EV_KEY(0x01) key_down: KEY_MEDIA(0x00e2)
311.272930: event type EV_SYN(0x00).
311.420857: lirc protocol(rc6_mce): scancode = 0x800f040d toggle=1
311.420900: event type EV_MSC(0x04): scancode = 0x800f040d
311.420900: event type EV_SYN(0x00).
311.638978: event type EV_KEY(0x01) key_up: KEY_MEDIA(0x00e2)
311.638978: event type EV_SYN(0x00).
^C

7. Check the file /etc/rc_maps.cfg exists and includes the following line:

*       rc-rc6-mce               rc6_mce.toml


ion330ht:/home/fitzcarraldo # cat /etc/rc_maps.cfg
#
# Keymaps table
#
# This table creates an association between a keycode file and a kernel
# driver. It can be used to automatically override a keycode definition.
#
# Although not yet tested, it is mented to be added at udev.
#
# To use, you just need to run:
#       ./ir-keytable -a
#
# Or, if the remote is not the first device:
#       ./ir-keytable -a -s rc1         # for RC at rc1
#

# Format:
#       driver - name of the driver provided via uevent - use * for any driver
#       table -  RC keymap table, provided via uevent - use * for any table
#       file - file name. If directory is not specified, it will default to
#               /etc/rc_keymaps.
# For example:
# driver        table                           file
# cx8800        *                               ./keycodes/rc5_hauppauge_new.toml
# *             rc-avermedia-m135a-rm-jx        ./keycodes/kworld_315u.toml
# saa7134       rc-avermedia-m135a-rm-jx        ./keycodes/keycodes/nec_terratec_cinergy_xs.toml
# em28xx        *                               ./keycodes/kworld_315u.toml
# *             *                               ./keycodes/rc5_hauppauge_new.toml

# Table to automatically load the rc maps for the bundled IR's provided with the
# devices supported by the linux kernel

#driver table                    file
*       rc-adstech-dvb-t-pci     adstech_dvb_t_pci.toml
*       rc-alink-dtu-m           alink_dtu_m.toml
*       rc-anysee                anysee.toml
*       rc-apac-viewcomp         apac_viewcomp.toml
*       rc-astrometa-t2hybrid    astrometa_t2hybrid.toml
*       rc-asus-pc39             asus_pc39.toml
*       rc-asus-ps3-100          asus_ps3_100.toml
*       rc-ati-tv-wonder-hd-600  ati_tv_wonder_hd_600.toml
*       rc-ati-x10               ati_x10.toml
*       rc-avermedia-a16d        avermedia_a16d.toml
*       rc-avermedia-cardbus     avermedia_cardbus.toml
*       rc-avermedia-dvbt        avermedia_dvbt.toml
*       rc-avermedia-m135a       avermedia_m135a.toml
*       rc-avermedia-m733a-rm-k6 avermedia_m733a_rm_k6.toml
*       rc-avermedia-rm-ks       avermedia_rm_ks.toml
*       rc-avermedia             avermedia.toml
*       rc-avertv-303            avertv_303.toml
*       rc-azurewave-ad-tu700    azurewave_ad_tu700.toml
*       rc-beelink-gs1           beelink_gs1.toml
*       rc-behold-columbus       behold_columbus.toml
*       rc-behold                behold.toml
*       rc-budget-ci-old         budget_ci_old.toml
*       rc-cec                   cec.toml
*       rc-cinergy-1400          cinergy_1400.toml
*       rc-cinergy               cinergy.toml
*       rc-ct-90405              ct_90405.toml
*       rc-d680-dmb              d680_dmb.toml
*       rc-delock-61959          delock_61959.toml
*       rc-dib0700-nec           dib0700_nec.toml
*       rc-dib0700-rc5           dib0700_rc5.toml
*       rc-digitalnow-tinytwin   digitalnow_tinytwin.toml
*       rc-digittrade            digittrade.toml
*       rc-dm1105-nec            dm1105_nec.toml
*       rc-dntv-live-dvb-t       dntv_live_dvb_t.toml
*       rc-dntv-live-dvbt-pro    dntv_live_dvbt_pro.toml
*       rc-dtt200u               dtt200u.toml
*       rc-dvbsky                dvbsky.toml
*       rc-dvico-mce             dvico_mce.toml
*       rc-dvico-portable        dvico_portable.toml
*       rc-em-terratec           em_terratec.toml
*       rc-encore-enltv-fm53     encore_enltv_fm53.toml
*       rc-encore-enltv          encore_enltv.toml
*       rc-encore-enltv2         encore_enltv2.toml
*       rc-evga-indtube          evga_indtube.toml
*       rc-eztv                  eztv.toml
*       rc-flydvb                flydvb.toml
*       rc-flyvideo              flyvideo.toml
*       rc-fusionhdtv-mce        fusionhdtv_mce.toml
*       rc-gadmei-rm008z         gadmei_rm008z.toml
*       rc-geekbox               geekbox.toml
*       rc-genius-tvgo-a11mce    genius_tvgo_a11mce.toml
*       rc-gotview7135           gotview7135.toml
*       rc-hauppauge             hauppauge.toml
*       rc-hisi-poplar           hisi_poplar.toml
*       rc-hisi-tv-demo          hisi_tv_demo.toml
*       rc-imon-mce              imon_mce.toml
*       rc-imon-pad              imon_pad.toml
*       rc-imon-rsc              imon_rsc.toml
*       rc-iodata-bctv7e         iodata_bctv7e.toml
*       rc-it913x-v1             it913x_v1.toml
*       rc-it913x-v2             it913x_v2.toml
*       rc-kaiomy                kaiomy.toml
*       rc-khadas                khadas.toml
*       rc-khamsin               khamsin.toml
*       rc-kworld-315u           kworld_315u.toml
*       rc-kworld-pc150u         kworld_pc150u.toml
*       rc-kworld-plus-tv-analog kworld_plus_tv_analog.toml
*       rc-leadtek-y04g0051      leadtek_y04g0051.toml
*       rc-lme2510               lme2510.toml
*       rc-manli                 manli.toml
*       rc-mecool-kii-pro        mecool_kii_pro.toml
*       rc-mecool-kiii-pro       mecool_kiii_pro.toml
*       rc-medion-x10-digitainer medion_x10_digitainer.toml
*       rc-medion-x10-or2x       medion_x10_or2x.toml
*       rc-medion-x10            medion_x10.toml
*       rc-minix-neo             minix_neo.toml
*       rc-msi-digivox-ii        msi_digivox_ii.toml
*       rc-msi-digivox-iii       msi_digivox_iii.toml
*       rc-msi-tvanywhere-plus   msi_tvanywhere_plus.toml
*       rc-msi-tvanywhere        msi_tvanywhere.toml
*       rc-nebula                nebula.toml
*       rc-nec-terratec-cinergy-xs nec_terratec_cinergy_xs.toml
*       rc-norwood               norwood.toml
*       rc-npgtech               npgtech.toml
*       rc-odroid                odroid.toml
*       rc-pctv-sedna            pctv_sedna.toml
*       rc-pine64                pine64.toml
*       rc-pinnacle-color        pinnacle_color.toml
*       rc-pinnacle-grey         pinnacle_grey.toml
*       rc-pinnacle-pctv-hd      pinnacle_pctv_hd.toml
*       rc-pixelview-002t        pixelview_002t.toml
*       rc-pixelview-mk12        pixelview_mk12.toml
*       rc-pixelview-new         pixelview_new.toml
*       rc-pixelview             pixelview.toml
*       rc-powercolor-real-angel powercolor_real_angel.toml
*       rc-proteus-2309          proteus_2309.toml
*       rc-purpletv              purpletv.toml
*       rc-pv951                 pv951.toml
*       rc-rc6-mce               rc6_mce.toml
*       rc-real-audio-220-32-keys real_audio_220_32_keys.toml
*       rc-reddo                 reddo.toml
*       rc-snapstream-firefly    snapstream_firefly.toml
*       rc-streamzap             streamzap.toml
*       rc-su3000                su3000.toml
*       rc-tanix-tx3mini         tanix_tx3mini.toml
*       rc-tanix-tx5max          tanix_tx5max.toml
*       rc-tbs-nec               tbs_nec.toml
*       rc-technisat-ts35        technisat_ts35.toml
*       rc-technisat-usb2        technisat_usb2.toml
*       rc-terratec-cinergy-c-pci terratec_cinergy_c_pci.toml
*       rc-terratec-cinergy-s2-hd terratec_cinergy_s2_hd.toml
*       rc-terratec-cinergy-xs   terratec_cinergy_xs.toml
*       rc-terratec-slim-2       terratec_slim_2.toml
*       rc-terratec-slim         terratec_slim.toml
*       rc-tevii-nec             tevii_nec.toml
*       rc-tivo                  tivo.toml
*       rc-total-media-in-hand-02 total_media_in_hand_02.toml
*       rc-total-media-in-hand   total_media_in_hand.toml
*       rc-trekstor              trekstor.toml
*       rc-tt-1500               tt_1500.toml
*       rc-twinhan-dtv-cab-ci    twinhan_dtv_cab_ci.toml
*       rc-twinhan1027           twinhan_vp1027_dvbs.toml
*       rc-vega-s9x              vega_s9x.toml
*       rc-videomate-k100        videomate_k100.toml
*       rc-videomate-s350        videomate_s350.toml
*       rc-videomate-tv-pvr      videomate_tv_pvr.toml
*       rc-videostrong-kii-pro   kii_pro.toml
*       rc-wetek-hub             wetek_hub.toml
*       rc-wetek-play2           wetek_play2.toml
*       rc-winfast-usbii-deluxe  winfast_usbii_deluxe.toml
*       rc-winfast               winfast.toml
*       rc-x96max                x96max.toml
*       rc-xbox-dvd              xbox_dvd.toml
*       rc-zx-irdec              zx_irdec.toml
# *     *                        af9005.toml          # found in af9005-remote.c
# *     *                        az6027.toml          # found in az6027.c
# *     *                        cinergyt2.toml       # found in cinergyT2-core.c
# *     *                        dibusb.toml          # found in dibusb-common.c
# *     *                        digitv.toml          # found in digitv.c
# *     *                        megasky.toml         # found in m920x.c
# *     *                        tvwalkertwin.toml    # found in m920x.c
# *     *                        pinnacle310e.toml    # found in m920x.c
# *     *                        haupp.toml           # found in nova-t-usb2.c
# *     *                        opera1.toml          # found in opera1.c
# *     *                        vp702x.toml          # found in vp702x.c

8. Copy the file /lib/udev/rc_keymaps/rc6_mce.toml to /etc/rc_keymaps/rc6_mce.toml and edit the latter. For example:

[[protocols]]
name = "rc6_mce"
protocol = "rc6"
variant = "rc6_mce"
[protocols.scancodes]
0x800f0400 = "KEY_KP0"
0x800f0401 = "KEY_KP1"
0x800f0402 = "KEY_KP2"
0x800f0403 = "KEY_KP3"
0x800f0404 = "KEY_KP4"
0x800f0405 = "KEY_KP5"
0x800f0406 = "KEY_KP6"
0x800f0407 = "KEY_KP7"
0x800f0408 = "KEY_KP8"
0x800f0409 = "KEY_KP9"
0x800f040a = "KEY_DELETE"
0x800f040b = "KEY_ENTER"
0x800f040c = "KEY_SLEEP"                  # Power
0x800f040d = "KEY_MEDIA"                  # Left Meta, Start
0x800f040e = "KEY_MUTE"
0x800f040f = "KEY_I"                      # Info
0x800f0410 = "KEY_VOLUMEUP"               # Volume Up
0x800f0411 = "KEY_VOLUMEDOWN"             # Volume Down
0x800f0412 = "KEY_CHANNELUP"
0x800f0413 = "KEY_CHANNELDOWN"
0x800f0414 = "KEY_FORWARD"                # Fast forward
0x800f0415 = "KEY_REWIND"                 # Rewind
0x800f0416 = "KEY_PLAY"
0x800f0417 = "KEY_RECORD"
0x800f0418 = "KEY_PLAYPAUSE"              # Was KEY_PLAY but didn't pause in Clementine
0x800f0419 = "KEY_STOP"
0x800f041a = "KEY_NEXTSONG"               # Skip Next
0x800f041b = "KEY_PREVIOUSSONG"           # Skip Previous
0x800f041c = "KEY_NUMERIC_POUND"
0x800f041d = "KEY_NUMERIC_STAR"
0x800f041e = "KEY_UP"
0x800f041f = "KEY_DOWN"
0x800f0420 = "KEY_LEFT"
0x800f0421 = "KEY_RIGHT"
0x800f0422 = "KEY_ENTER"                  # OK
0x800f0423 = "KEY_BACKSPACE"              # Back / Exit
0x800f0424 = "KEY_DVD"
0x800f0425 = "KEY_TUNER"
0x800f0426 = "KEY_EPG"
0x800f0427 = "KEY_ZOOM"
0x800f043a = "KEY_BRIGHTNESSUP"
0x800f0446 = "KEY_TV"
0x800f0447 = "KEY_AUDIO"
0x800f0448 = "KEY_PVR"
0x800f0449 = "KEY_CAMERA"
0x800f044a = "KEY_VIDEO"
0x800f044c = "KEY_LANGUAGE"
0x800f044d = "KEY_TITLE"
0x800f044e = "KEY_PRINT"
0x800f0450 = "KEY_RADIO"
0x800f045a = "KEY_SUBTITLE"
0x800f045b = "KEY_RED"
0x800f045c = "KEY_GREEN"                  # Green
0x800f045d = "KEY_YELLOW"
0x800f045e = "KEY_BLUE"                   # Blue
0x800f0465 = "KEY_POWER2"
0x800f046e = "KEY_PLAYPAUSE"
0x800f046f = "KEY_MEDIA"
0x800f0480 = "KEY_BRIGHTNESSDOWN"
0x800f0481 = "KEY_PLAYPAUSE"

9. Run the following command to load the edited keymap and check that it works:

ion330ht:/home/fitzcarraldo # ir-keytable -c -w /etc/rc_keymaps/rc6_mce.toml
Read rc6_mce table
Old keytable cleared
Wrote 60 keycode(s) to driver
Protocols changed to rc-6

By the way, adding ‘-p RC-5,RC-6‘ to that command would select the rc-5 and rc-6 protocols:

ion330ht:/home/fitzcarraldo # ir-keytable -c -p RC-5,RC-6 -w /etc/rc_keymaps/rc6_mce.toml
Read rc6_mce table
Old keytable cleared
Wrote 60 keycode(s) to driver
Protocols changed to rc-5 rc-6

10. Check that the protocols have been enabled and the keymap loaded:

ion330ht:/home/fitzcarraldo # ir-keytable
Found /sys/class/rc/rc0/ with:
        Name: Nuvoton w836x7hg Infrared Remote Transceiver
        Driver: nuvoton-cir
        Default keymap: rc-rc6-mce
        Input device: /dev/input/event7
        LIRC device: /dev/lirc0
        Supported kernel protocols: lirc rc-5 rc-5-sz jvc sony nec sanyo mce_kbd rc-6 sharp xmp imon rc-mm 
        Enabled kernel protocols: lirc rc-6 
        bus: 25, vendor/product: 1050:00b4, version: 0x0073
        Repeat delay = 500 ms, repeat period = 125 ms

11. Reboot.

12. Check that the modified keymap has been loaded:

ion330ht:/home/fitzcarraldo # ir-keytable
Found /sys/class/rc/rc0/ with:
        Name: Nuvoton w836x7hg Infrared Remote Transceiver
        Driver: nuvoton-cir
        Default keymap: rc-rc6-mce
        Input device: /dev/input/event7
        LIRC device: /dev/lirc0
        Supported kernel protocols: lirc rc-5 rc-5-sz jvc sony nec sanyo mce_kbd rc-6 sharp xmp imon rc-mm 
        Enabled kernel protocols: lirc rc-6 
        bus: 25, vendor/product: 1050:00b4, version: 0x0073
        Repeat delay = 500 ms, repeat period = 125 ms
ion330ht:/home/fitzcarraldo # ir-keytable -t
Testing events. Please, press CTRL-C to abort.
1392.769850: lirc protocol(rc6_mce): scancode = 0x800f040d toggle=1
1392.769898: event type EV_MSC(0x04): scancode = 0x800f040d
1392.769898: event type EV_KEY(0x01) key_down: KEY_MEDIA(0x002e)
1392.769898: event type EV_SYN(0x00).
c1392.917858: lirc protocol(rc6_mce): scancode = 0x800f040d toggle=1
1392.917899: event type EV_MSC(0x04): scancode = 0x800f040d
1392.917899: event type EV_SYN(0x00).
1393.137843: event type EV_KEY(0x01) key_up: KEY_MEDIA(0x002e)
1393.137843: event type EV_SYN(0x00).
1409.275700: lirc protocol(rc6_mce): scancode = 0x800f0418
1409.275756: event type EV_MSC(0x04): scancode = 0x800f0418
1409.275756: event type EV_KEY(0x01) key_down: KEY_PLAYPAUSE(0x00a4)
1409.275756: event type EV_SYN(0x00).
1409.425095: lirc protocol(rc6_mce): scancode = 0x800f0418
1409.425131: event type EV_MSC(0x04): scancode = 0x800f0418
1409.425131: event type EV_SYN(0x00).
1409.641846: event type EV_KEY(0x01) key_up: KEY_PLAYPAUSE(0x00a4)
1409.641846: event type EV_SYN(0x00).
1411.757874: lirc protocol(rc6_mce): scancode = 0x800f0418 toggle=1
1411.757928: event type EV_MSC(0x04): scancode = 0x800f0418
1411.757928: event type EV_KEY(0x01) key_down: KEY_PLAYPAUSE(0x00a4)
1411.757928: event type EV_SYN(0x00).
1411.907269: lirc protocol(rc6_mce): scancode = 0x800f0418 toggle=1
1411.907296: event type EV_MSC(0x04): scancode = 0x800f0418
1411.907296: event type EV_SYN(0x00).
1412.125848: event type EV_KEY(0x01) key_up: KEY_PLAYPAUSE(0x00a4)
1412.125848: event type EV_SYN(0x00).
^C

However, not all the keys on the ASRock remote work in KODI when using the key names in the file rc6_mce.toml listed above. I might have been able to change some of the key names in the file to see if they would have the desired effect in KODI, but it is not worth the hassle when my Rii i8 wireless mini keyboard works perfectly with KODI, all other apps, and the Linux Desktop. I find KODI unintuitive in any case, so there is even less incentive to tinker further with the ASRock CIR MCE remote.

Furthermore, I have now disabled the CIR port in the BIOS because I found that sometimes the nettop was resuming from suspension without me triggering it from either the ASRock CIR MCE remote or the Rii i8 mini keyboard. ‘Boot From Onboard LAN’ is not enabled in the BIOS, so that was not the cause.
 
 
Disabling the nettop’s LEDs

The nettop is on my TV stand and its Power LED, LAN LED and SATA LED could become annoying, especially the blinking power LED when the nettop is in Suspend mode, so I disabled these in the BIOS (‘Good Night LED’ is Enabled to turn them all off).
 
 
Conclusion

After over a decade I am actually using the ASRock ION 330HT nettop and have it connected to my 43-inch TV so that I can browse the Web properly from the comfort of my sofa and play all my FLAC (and MP3, OGG etc.) music files through the sound bar also connected to my TV. The Rii i8 wireless mini keyboard/touchpad works perfectly with the nettop, so the ASRock CIR MCE remote is redundant. Although I have a dedicated DVD player connected to the TV via a Composite Video cable, the nettop is connected via an HDMI cable so the image is nice and sharp.

GeckoLinux Rolling LXQt performs well on the nettop, and looks polished and crisp on the TV screen. I like it a lot so far. Other machines in my home network can browse SMB shares on the nettop, and vice versa, and the nettop can also be accessed using SSH. I need to become familiar with the package manager (GUI and command line) but have not had any trouble so far. The Btrfs filesystem ‘hiccup’ I mentioned earlier worries me a little, but I have had no further trouble since I repaired the filesystem. And I have actually used Snapper a couple of times to recover files I deleted too hastily. So GeckoLinux gets a thumbs up from me.

Gentoo Linux: Building/rebuilding a kernel and Intel CPU microcode in an installation with initramfs

In a 2014 post I explained how to update the Intel CPU microcode in a Gentoo Linux installation with an initramfs (I use sys-kernel/genkernel to build the kernel in the installation on my Compal NBLB2 laptop, which is running the Testing Branch of Gentoo Linux although the branch is not important). The initscript method (Method 1 in that post) for updating the CPU microcode is no longer valid, and the behaviour of the tool sys-apps/iucode_tool for updating the CPU microcode (Method 2 in that post) has changed, hence this update.

Although not essential I normally perform the microcode upgrade procedure when I either rebuild or upgrade the Linux kernel, therefore I explain both procedures contiguously here.

These days the grub-mkconfig command edits the file /boot/grub/grub.cfg to add a line to the GRUB menu entries, to load the CPU microcode at boot, but nevertheless I prefer to follow a slightly different method that works reliably for me.

Below is the procedure I follow to build/rebuild the kernel and the Intel CPU microcode. Others may have a different approach, but this has always worked well for me, even if some of the steps are sometimes nugatory.

If they are not already installed, you need to merge a couple of packages before starting the main procedure:

root # emerge app-arch/lzma # Needed to build bzImage.
root # emerge iucode_tool

1. Mount the boot directory if it is on a separate partition

root # mount /dev/sda3 /boot

2. Check which kernel sources are installed and which of those sources is currently selected

root # eselect kernel list

3. Make a back-up configuration file for the current running kernel

root # zcat /proc/config.gz > /usr/src/config

4. Select the kernel sources I want to build

root # eselect kernel set <n>

5. Build the kernel image and the initramfs image

root # genkernel --kernel-config=/usr/src/config --clean --menuconfig --microcode=intel --no-splash --module-rebuild all

I have configured the following kernel options relating to the early loading of the Intel CPU microcode (see later):

root # grep CONFIG_BLK_DEV_INITRD /usr/src/linux/.config
CONFIG_BLK_DEV_INITRD=y
root # # grep CONFIG_MICROCODE /usr/src/linux/.config
CONFIG_MICROCODE=y
CONFIG_MICROCODE_INTEL=y
# CONFIG_MICROCODE_AMD is not set
# CONFIG_MICROCODE_OLD_INTERFACE is not set
# grep CONFIG_INITRAMFS_SOURCE /usr/src/linux/.config
CONFIG_INITRAMFS_SOURCE=""

6. Rebuild the X Windows Server and X Windows drivers

I always do this even though not always necessary. One less thing to think about (not rebuilding them has sometimes caused me problems).

root # emerge xorg-server xorg-drivers

7. Rebuild NetworkManager if it is installed

I always do this even though not always necessary. One less thing to think about (not rebuilding it has sometimes caused me problems).

root # emerge networkmanager

8. If there is a new version of the Intel CPU microcode, generate it and copy it to the boot directory

For several years updates to the package sys-kernel/linux-firmware have not resulted in a change to the version of Intel CPU microcode for the legacy Intel Core i7-720QM CPU in my Compal NBLB2 laptop, as Intel no longer supports that version of CPU. Nevertheless it does no harm to repeat the procedure.

root # emerge sys-firmware/intel-microcode
root # rm /boot/microcode.cpio
root # iucode_tool -S --write-earlyfw=/boot/microcode.cpio /lib/firmware/intel-ucode/*
root # rm /boot/intel-uc.img

(The fourth command is to stop the grub-mkconfig command (see Step 9.2) adding intel-uc.img to the initrd line in the grub.cfg file.)

Note the USE flags for that I have set and cleared for sys-firmware/intel-microcode:

root # equery uses intel-microcode
[ Legend : U - final flag setting for installation]
[        : I - package is installed with flag     ]
[ Colors : set, unset                             ]
 * Found these USE flags for sys-firmware/intel-microcode-20210608_p20210830:
 U I
 - - hostonly    : only install ucode(s) supported by currently available (=online) processor(s) 
 - - initramfs   : install a small initramfs for use with CONFIG_MICROCODE_EARLY 
 + + split-ucode : install the split binary ucode files (used by the kernel directly) 
 - - vanilla     : install only microcode updates from Intel's official microcode tarball

9. Create a new grub.cfg file

9.1 First check the contents of /etc/default/grub to make sure it will be OK for the new version of the kernel

root # nano /etc/default/grub

Modify the contents of /etc/default/grub if necessary for the kernel version that has just been built.

9.2 Generate a new grub.cfg file

root # grub-mkconfig -o /boot/grub/grub.cfg

9.3 Check the new grub.cfg file includes the loading of the CPU microcode

root # nano /boot/grub/grub.cfg

The last line for each menu entry (i.e. the line before the closing curly bracket of the menu entry) should contain:

initrd /microcode.cpio /initramfs-<kernel version>-gentoo-x86_64.img

as shown in the example file excerpt below:

[...]
### BEGIN /etc/grub.d/10_linux ###
menuentry 'Gentoo GNU/Linux' --class gentoo --class gnu-linux --class gnu --class os $menuentry_id_option 'gnulinux-simple-9db2f668-a682-4d6f-abc5-ed6f6c515b95' {
load_video
set gfxpayload=1024x768
insmod gzio
insmod part_msdos
insmod ext2
set root='hd0,msdos3'
if [ x$feature_platform_search_hint = xy ]; then
search --no-floppy --fs-uuid --set=root --hint-bios=hd0,msdos3 --hint-efi=hd0,msdos3 --hint-baremetal=ahci0,msdos3  597e8c88-8d50-443f-ae19-f510844f5d4e
else
search --no-floppy --fs-uuid --set=root 597e8c88-8d50-443f-ae19-f510844f5d4e
fi
echo	'Loading Linux 5.15.0-gentoo-x86_64 ...'
linux	/vmlinuz-5.15.0-gentoo-x86_64 root=/dev/sda6 ro BOOT_IMAGE=/kernel-genkernel-x86_64-5.15.0-gentoo root=/dev/ram0 ramdisk=8192 real_root=/dev/sda6 init=/linuxrc resume=swap:/dev/sda5 real_resume=/dev/sda5 intel_iommu=off net.ifnames=0 snd_hda_intel.power_save=0 radeon.modeset=1
echo	'Loading initial ramdisk ...'
initrd	/microcode.cpio /initramfs-5.15.0-gentoo-x86_64.img
}
submenu 'Advanced options for Gentoo GNU/Linux' $menuentry_id_option 'gnulinux-advanced-9db2f668-a682-4d6f-abc5-ed6f6c515b95' {
menuentry 'Gentoo GNU/Linux, with Linux 5.15.0-gentoo-x86_64' --class gentoo --class gnu-linux --class gnu --class os $menuentry_id_option 'gnulinux-5.15.0-gentoo-x86_64-advanced-9db2f668-a682-4d6f-abc5-ed6f6c515b95' {
load_video
set gfxpayload=1024x768
insmod gzio
insmod part_msdos
insmod ext2
set root='hd0,msdos3'
if [ x$feature_platform_search_hint = xy ]; then
search --no-floppy --fs-uuid --set=root --hint-bios=hd0,msdos3 --hint-efi=hd0,msdos3 --hint-baremetal=ahci0,msdos3  597e8c88-8d50-443f-ae19-f510844f5d4e
else
search --no-floppy --fs-uuid --set=root 597e8c88-8d50-443f-ae19-f510844f5d4e
fi
echo	'Loading Linux 5.15.0-gentoo-x86_64 ...'
linux	/vmlinuz-5.15.0-gentoo-x86_64 root=/dev/sda6 ro BOOT_IMAGE=/kernel-genkernel-x86_64-5.15.0-gentoo root=/dev/ram0 ramdisk=8192 real_root=/dev/sda6 init=/linuxrc resume=swap:/dev/sda5 real_resume=/dev/sda5 intel_iommu=off net.ifnames=0 snd_hda_intel.power_save=0 radeon.modeset=1
echo	'Loading initial ramdisk ...'
initrd	/microcode.cpio /initramfs-5.15.0-gentoo-x86_64.img
}
menuentry 'Gentoo GNU/Linux, with Linux 5.15.0-gentoo-x86_64 (recovery mode)' --class gentoo --class gnu-linux --class gnu --class os $menuentry_id_option 'gnulinux-5.15.0-gentoo-x86_64-recovery-9db2f668-a682-4d6f-abc5-ed6f6c515b95' {
load_video
set gfxpayload=1024x768
insmod gzio
insmod part_msdos
insmod ext2
set root='hd0,msdos3'
if [ x$feature_platform_search_hint = xy ]; then
search --no-floppy --fs-uuid --set=root --hint-bios=hd0,msdos3 --hint-efi=hd0,msdos3 --hint-baremetal=ahci0,msdos3  597e8c88-8d50-443f-ae19-f510844f5d4e
else
search --no-floppy --fs-uuid --set=root 597e8c88-8d50-443f-ae19-f510844f5d4e
fi
echo	'Loading Linux 5.15.0-gentoo-x86_64 ...'
linux	/vmlinuz-5.15.0-gentoo-x86_64 root=/dev/sda6 ro single BOOT_IMAGE=/kernel-genkernel-x86_64-5.15.0-gentoo root=/dev/ram0 ramdisk=8192 real_root=/dev/sda6 init=/linuxrc resume=swap:/dev/sda5 real_resume=/dev/sda5 intel_iommu=off net.ifnames=0 snd_hda_intel.power_save=0 radeon.modeset=1
echo	'Loading initial ramdisk ...'
initrd	/microcode.cpio /initramfs-5.15.0-gentoo-x86_64.img
}
}

### END /etc/grub.d/10_linux ###
[...]

10. Reboot

11. Rebuild VirtualBox if it is installed

root # emerge virtualbox

12. Check the current version of the Intel CPU microcode

Either:

root # dmesg | grep microcode

or:

root # grep microcode /proc/cpuinfo

For example:

root # dmesg | grep microcode
[    0.000000] microcode: microcode updated early to revision 0xa, date = 2018-05-08
[    0.127937] MDS: Vulnerable: Clear CPU buffers attempted, no microcode
[    1.558008] microcode: sig=0x106e5, pf=0x10, revision=0xa
[    1.559335] microcode: Microcode Update Driver: v2.2.
root # grep microcode /proc/cpuinfo
microcode       : 0xa

Note from the output of the dmesg command that this specific CPU model is susceptible to the MDS (Microarchitectural Data Sampling) vulnerability.

13. Edit /var/lib/portage/world and add (or change) the specific kernel sources package version

I do this in order to ensure the command ‘emerge --depclean‘ does not remove a specific kernel’s source code during a world update. I want Portage always to install the latest version of gentoo-sources but not to delete the version of gentoo-sources that corresponds to the kernel my installation is currently using.

For example, let’s say I have just replaced a kernel built from gentoo-sources:5.15.11 with a kernel built from gentoo-sources:5.15.12. My world file would initially contain the following:

[...]
sys-kernel/gentoo-sources
sys-kernel/gentoo-sources:5.15.11
[...]

If, following a successful reboot with kernel 5.15.12, I want to delete the files for kernel 5.15.11 in /boot/ (initramfs-5.15.11-gentoo-x86_64.img, System.map-5.15.11-gentoo-x86_64 and vmlinuz-5.15.11-gentoo-x86_64) and to edit the file /boot/grub/grub.cfg to remove the menu entries for kernel 5.15.11, I would change the world file’s contents to:

[...]
sys-kernel/gentoo-sources
sys-kernel/gentoo-sources:5.15.12
[...]

On the other hand, if, following a successful reboot, I want to keep the files for both kernel 5.15.11 and kernel 5.15.12, I would change the world file’s contents to:

[...]
sys-kernel/gentoo-sources
sys-kernel/gentoo-sources:5.15.11
sys-kernel/gentoo-sources:5.15.12
[...]

Work-around if movie subtitles restart after the final subtitle is displayed

If I’m watching movies in a language I don’t understand, I want subtitles. On my computers this is possible as long as there is a subtitles file with the name suffix .srt and the same prefix name as the .mp4 video file in the same directory. I usually prefer to view movies on my TV with a bigger screen, so I copy the movie to a HDD that is normally connected to my TV (a FINLUX model 43-FUD-8020). However, the built-in media player in the TV does not show the subtitles in the .srt file, even when it is in the same directory as the .mp4 file. Therefore I use the MKVToolNix utility mkvmerge to put the movie and subtitles into a Matroska multimedia container (.mkv file), and the TV’s media player can play these .mkv files and does display the subtitles. In fact, so can my laptops and desktop running Linux (I have not tried on a machine running Windows 10, but I assume Windows 10 would have no trouble either).

To install in Lubuntu 20.10:

user $ sudo apt install mkvtoolnix

To install in Gentoo Linux:

root # emerge mkvtoolnix

To create a Matroska file containing the movie plus subtitles:

user $ mkvmerge -o movie_with_subtitles.mkv movie_without_subtitles.mp4 subtitles.srt

Normally the last subtitle in a movie does not occur at the very end of the movie. For example, there could be action without dialogue at the end of the movie, and/or final credits without dialogue. The media players on my laptops and desktop running Linux display the last subtitle and play the rest of the movie in the Matroska container as expected. However, the media player in my FINLUX TV displays the last subtitle and then displays the subtitles from the beginning again, at breakneck speed. Annoying to say the least. As the problem does not occur on my laptops and desktop with the same .mkv file, I assume the problem lies with the media player in the TV.

At first I suspected that the .srt file was the cause, but it correctly uses UTF-8 encoding and the syntax of the contents is correct. Anyway, just to be sure I ran it through an online cleaner for .srt files and re-generated the .mkv file, but that made no difference on the TV. Since there is no problem playing the .mkv file on my computers, I can only assume the TV’s media player is indeed at fault. I cannot do anything about the TV’s media player, so I came up with an acceptable work-around: I added a dummy subtitle at the end of the .srt file that is set to be displayed at the very end of the movie. For example, let’s say the movie duration is two hours, 12 minutes and twenty-two seconds but the last subtitle is at 01:56:38,201:

188
01:56:38,201 --> 01:56:40,286
The end justifies the means.

I edited the file and added a dummy subtitle at the end:

188
01:56:38,201 --> 01:56:40,286
The end justifies the means.

189
02:12:19,001 --> 02:12:21,999
THE END.

I then re-generated the .mkv file using the mkvmerge command and, lo and behold, after the subtitle displayed between at 01:56:38,201 and 01:56:40,286 the TV no longer displays any more subtitles until the very end of the movie when it displays ‘THE END’ and the video ends. Actually, in reality the movie must be very slightly longer than 02:12:21,999 because, after displaying ‘THE END’, the first six subtitles in the subtitle file are displayed in rapid succession before the media player stops playing, but that is no big deal.

I searched the Web quite a lot and was unable to find any mention of this particular problem, so I am posting my work-around here just in case it helps someone else experiencing the same problem.

‘IP configuration was unavailable’: a laptop cannot connect wirelessly to a router

I recently switched my ISP from BT to Virgin Media because the speed and reliability of the broadband connection were low. A Virgin Media Hub 3 was supplied as part of the package, and the TV, laptops (Gentoo Linux, Windows 10 and macOS), desktops (Lubuntu and Windows 10), tablets and phones (Android and iOS) could connect to the Hub 3 without any trouble. A few weeks later Virgin Media offered to upgrade the hub to a Hub 4. I don’t look a gift horse in the mouth, so I accepted the offer. The Hub 4 does indeed improve on the already excellent broadband speeds I was getting with the Hub 3. On the downside the Hub 4’s configuration software has a couple of bugs, but I was able to live with them.

In addition to the above-mentioned hub configuration bugs, one of my laptops (a Compal NBLB2 with Intel Wireless WiFi Link 5300 AGN adapter) running Linux could not connect to the hub via Wi-Fi, even though it had no trouble connecting to the Hub 3. All other devices so far can connect to the Hub 4, so I was scratching my head. The laptop has no trouble connecting to the Hub 4 via Ethernet cable.

The hub’s 5G and 2.4G Wi-Fi bands originally had the same SSID (I’ll call it ‘VM1234567‘ here). I decided to rename the two bands ‘VM1234567_5G‘ and ‘VM1234567_2.4G‘ respectively, via the hub’s Settings in a Web browser. Very occasionally the laptop could connect to either SSID, but usually it could not connect and the following notification would pop up:

Wireless interface (wlan0)
IP configuration was unavailable

I did various things to try to get the laptop to connect, such as:

  • changing Wi-Fi channel selection in the hub from Auto to Manual and specifying different channels myself;
  • specifying the BSSID in the Desktop Environment’s GUI front-end to NetworkManager;
  • explicitly restricting the connection to the specific (and only) Wi-Fi interface (‘wlan0‘, in my case) in the DE’s GUI front-end to NetworkManager;
  • disabling IPv6 (Virgin Media does not use IPv6) in the DE’s GUI front-end to NetworkManager;
  • disabling the UFW firewall.

None of the above enabled the laptop to connect to the hub via Wi-Fi.

I installed the GUI Wi-Fi scanner LinSSID on my other Linux machines so I could check which 2.4G and 5G Wi-Fi channels were being used by the hub and by my neighbours’ hubs/routers. Note that LinSSID requires the utility iw to be installed and CONFIG_CFG80211_WEXT to be set in the kernel. The NetworkManager command ‘nmcli dev wifi list‘ can also be used to check which channels are being used. The channels selected automatically by the hub looked reasonable to me, and the different channels I selected manually did not improve the situation.

Now, coincidentally that laptop can dual-boot Windows 7, so I booted Windows 7 to see if it could connect to the hub via Wi-Fi. However, Windows 7 had the same Wi-Fi connectivity problem as Linux. The Network and Sharing Centre displayed the error message ‘The default gateway is not available’ and allowed me to run the so-called Troubleshooter, which fixed the problem in Windows 7. The laptop could then connect to the hub and to the Internet via the 5G Wi-Fi band (the hub’s DHCP server allocated IP address 192.168.0.145 to the laptop). So it appeared the lack of a specified default gateway was the problem in both OSs. This surprised me because I had never had to specify a default gateway on my machines, and still do not have to on the other machines. Anyway, I booted back into Linux and did the following:

STEP 1 (on the Compal laptop)

Connected to the hub via an Ethernet cable.

Opened the Hub 4 Settings page (192.168.0.1) in a Web browser.

Selected ‘Advanced settings’ > ‘DHCP’

Added the MAC address of the laptop’s Wi-Fi adapter and the IP address 192.168.0.145 to the Reserved list.

STEP 2 (on the Compal laptop)

Selected ‘System Settings’ > ‘Network’ | ‘Connections’

Selected Wi-Fi connection VM1234567_5G

Entered the following on the ‘IPv4’ tab:

Method: Manual
DNS Servers: 194.168.4.100,194.168.8.100
Search Domains: cable.virginm.net (The laptop connects without this entry, so I’m not sure if it makes any difference.)

Clicked ‘+ Add’ and added the gateway details as follows:

Address
192.168.0.145

Netmask
255.255.255.0

Gateway
192.168.0.1

Ticked ‘IPv4 is required for this connection’.

Set the following on the ‘Wi-Fi’ tab (this is optional):

BSSID: <hub’s MAC address corresponding to the SSID>
Restrict to device: wlan0 (<MAC address of the laptop’s Wi-Fi adapter>)

The BSSID can be found either by using LinSSID on a machine that can access the Wi-Fi network or by using the command ‘nmcli dev wifi list‘ in a terminal window. The MAC address of the laptop’s Wi-Fi adapter can be found using the commands ‘ip link‘ or ‘ifconfig‘.

Clicked on the down arrow in the ‘Restrict to device:’ box and selected the device (wlan0, in my case).

STEP 3 (on the Compal laptop)

Selected ‘System Settings’ > ‘Network’ | ‘Connections’

Selected Wi-Fi connection VM1234567_2.4G

Performed the same configuration steps as for VM1234567_5G except that the SSID V1234567_2.4G has a different BSSID (found using LinSSID or nmcli) to the SSID V1234567_5G.

The laptop’s 5G W-Fi connection now works very well with the Hub 4. The 2.4G connection can be slow (even when the signal is at 100%) and sometimes stalls, so I’m not sure I have fixed that connection completely, or even if it is fixable in this case. I still do not know why the problem occurs with the Hub 4 but not the Hub 3, and why it only happens with one specific machine. Anyway, the 5G connection now works fine, so I’m happy.

Gentoo Linux: Building/rebuilding a kernel and Intel CPU microcode in an installation without initramfs

In a 2016 post I explained how to update the Intel CPU microcode in a Gentoo Linux Stable Branch installation without an initramfs (I do not use sys-kernel/genkernel to build the kernel in the installation on my Clevo W230SS laptop). The behaviour of the tool sys-apps/iucode_tool for updating the Intel CPU microcode has changed since that post, hence this update.

Although not essential I normally perform the microcode upgrade procedure when I either rebuild or upgrade the Linux kernel, therefore I explain both procedures contiguously here.

These days the grub-mkconfig command edits the file /boot/grub/grub.cfg to add a line to the GRUB menu entries, to load the CPU microcode at boot, but nevertheless I prefer to follow a slightly different method that works reliably for me.

Below is the procedure I follow to build/rebuild the kernel and the Intel CPU microcode. Others may have a different approach, but this has always worked well for me, even if some of the steps are sometimes nugatory.

1. Mount the boot directory if it is on a separate partition

root # mount /dev/sda1 /boot

2. Check which kernel sources are installed and which of those sources is currently selected

root # eselect kernel list

3. Make a back-up of the current kernel configuration file

root # cp /usr/src/linux-`uname -r`/.config /home/fitzcarraldo/kernel-config-`uname -r`

4. Select the kernel sources I want to build

root # eselect kernel set <n>

5. Change to the currently selected kernel sources directory

root # cd /usr/src/linux

6. If wanting to build a new version of the kernel, create a template configuration file

N.B. Do NOT do this if rebuilding the kernel version that is currently in use.

root # cp /usr/src/linux-`uname -r`/.config /usr/src/linux/.config

7. Remove any existing object files

Definitely needed if the ‘make‘ command (see further on) returns an error message mentioning an old version of the compiler. It does no harm to perform this step in any case, so I always do it.

root # make clean

8. If building a new version of the kernel, create a new configuration file

N.B. Do NOT do this if rebuilding the kernel version that is currently in use.

root # make olddefconfig

The command ‘make olddefconfig‘ will edit the existing /usr/src/linux/.config file, keeping all the existing options in the file and setting any new options to their recommended (i.e. default) values.

9. Display a TUI menu of the kernel options in the .config file and make any desired changes

root # make menuconfig

I have configured the following kernel options relating to the early loading of the Intel CPU microcode (see later):

root # grep CONFIG_BLK_DEV_INITRD /usr/src/linux/.config
CONFIG_BLK_DEV_INITRD=y
root # grep CONFIG_MICROCODE /usr/src/linux/.config
CONFIG_MICROCODE=y
CONFIG_MICROCODE_INTEL=y
# CONFIG_MICROCODE_AMD is not set
# CONFIG_MICROCODE_OLD_INTERFACE is not set
root # grep CONFIG_INITRAMFS_SOURCE /usr/src/linux/.config
CONFIG_INITRAMFS_SOURCE=""

10. Build the kernel and modules

root # make && make modules_install
root # make install

11. Rebuild any third-party packages containing kernel modules

These could include packages such as nvidia-drivers, for example.

root # emerge @module-rebuild

In my case, currently the @module-rebuild set only comprises the following two packages:

root # cat /var/lib/module-rebuild/moduledb
a:1:app-emulation/virtualbox-modules-6.1.24
a:1:x11-drivers/nvidia-drivers-470.63.01

12. Rebuild the X Windows Server and X Windows drivers

I always do this even though not always necessary. One less thing to think about (not rebuilding them has sometimes caused me problems).

root # emerge xorg-server xorg-drivers

13. Rebuild NetworkManager if it is installed

I always do this even though not always necessary. One less thing to think about (not rebuilding it has sometimes caused me problems).

root # emerge networkmanager

14. If there is a new version of the Intel CPU microcode, generate it and copy it to the boot directory

Updates to the package sys-firmware/intel-microcode in the last couple of years have not resulted in a change to the version of Intel CPU microcode for the fourth-generation Intel Core i7-4810MQ CPU in my Clevo W230SS laptop, so I assume Intel no longer supports that version of CPU. Nevertheless it does no harm to repeat the procedure.

root # rm /boot/microcode.cpio
root # iucode_tool -S --write-earlyfw=/boot/microcode.cpio /lib/firmware/intel-ucode/*
root # rm /boot/intel-uc.img

(The third command is to stop the grub-mkconfig command (see later) adding intel-uc.img to the initrd line in the grub.cfg file.)

15. If a different version of the kernel has just been built, or if this is the first time upgrading the CPU microcode, create a new grub.cfg file

15.1 First check the contents of /etc/default/grub to make sure it will be OK for the new version of the kernel

root # nano /etc/default/grub

Modify the contents of /etc/default/grub if necessary for the kernel that has just been built.

15.2 Generate a new grub.cfg file

root # grub-mkconfig -o /boot/grub/grub.cfg

15.3 Check the new grub.cfg file includes the loading of the CPU microcode

root # nano /boot/grub/grub.cfg

The last line for each menu entry (i.e. the line before the closing curly bracket of the menu entry) should contain only ‘initrd /microcode.cpio‘, as shown in the example file excerpt below:

[...]
### BEGIN /etc/grub.d/10_linux ###
menuentry 'Gentoo GNU/Linux' --class gentoo --class gnu-linux --class gnu --class os $menuentry_id_option 'gnulinux-simple-525a90f1-8ad2-44a3-ade3-20f18a0a9595' {
load_video
insmod gzio
insmod part_msdos
insmod ext2
set root='hd0,msdos1'
if [ x$feature_platform_search_hint = xy ]; then
search --no-floppy --fs-uuid --set=root --hint-bios=hd0,msdos1 --hint-efi=hd0,msdos1 --hint-baremetal=ahci0,msdos1  f6ffc085-66fe-4bbe-b080-cec355749f85
else
search --no-floppy --fs-uuid --set=root f6ffc085-66fe-4bbe-b080-cec355749f85
fi
echo	'Loading Linux 5.10.61-gentoo ...'
linux	/vmlinuz-5.10.61-gentoo root=/dev/sda5 ro  locale=en_GB i965.modeset=1 rcutree.rcu_idle_gp_delay=1 acpi_enforce_resources=lax reboot=force raid=noautodetect resume=/dev/sda2
echo	'Loading initial ramdisk ...'
initrd	/microcode.cpio
}
submenu 'Advanced options for Gentoo GNU/Linux' $menuentry_id_option 'gnulinux-advanced-525a90f1-8ad2-44a3-ade3-20f18a0a9595' {
menuentry 'Gentoo GNU/Linux, with Linux 5.10.61-gentoo' --class gentoo --class gnu-linux --class gnu --class os $menuentry_id_option 'gnulinux-5.10.61-gentoo-advanced-525a90f1-8ad2-44a3-ade3-20f18a0a9595' {
load_video
insmod gzio
insmod part_msdos
insmod ext2
set root='hd0,msdos1'
if [ x$feature_platform_search_hint = xy ]; then
search --no-floppy --fs-uuid --set=root --hint-bios=hd0,msdos1 --hint-efi=hd0,msdos1 --hint-baremetal=ahci0,msdos1  f6ffc085-66fe-4bbe-b080-cec355749f85
else
search --no-floppy --fs-uuid --set=root f6ffc085-66fe-4bbe-b080-cec355749f85
fi
echo	'Loading Linux 5.10.61-gentoo ...'
linux	/vmlinuz-5.10.61-gentoo root=/dev/sda5 ro  locale=en_GB i965.modeset=1 rcutree.rcu_idle_gp_delay=1 acpi_enforce_resources=lax reboot=force raid=noautodetect resume=/dev/sda2
echo	'Loading initial ramdisk ...'
initrd	/microcode.cpio
}
menuentry 'Gentoo GNU/Linux, with Linux 5.10.61-gentoo (recovery mode)' --class gentoo --class gnu-linux --class gnu --class os $menuentry_id_option 'gnulinux-5.10.61-gentoo-recovery-525a90f1-8ad2-44a3-ade3-20f18a0a9595' {
load_video
insmod gzio
insmod part_msdos
insmod ext2
set root='hd0,msdos1'
if [ x$feature_platform_search_hint = xy ]; then
search --no-floppy --fs-uuid --set=root --hint-bios=hd0,msdos1 --hint-efi=hd0,msdos1 --hint-baremetal=ahci0,msdos1  f6ffc085-66fe-4bbe-b080-cec355749f85
else
search --no-floppy --fs-uuid --set=root f6ffc085-66fe-4bbe-b080-cec355749f85
fi
echo	'Loading Linux 5.10.61-gentoo ...'
linux	/vmlinuz-5.10.61-gentoo root=/dev/sda5 ro single
echo	'Loading initial ramdisk ...'
initrd	/microcode.cpio
}
}

### END /etc/grub.d/10_linux ###
[...]

16. Reboot

17. Rebuild VirtualBox if it is installed

root # emerge virtualbox

18. Check the current version of the Intel CPU microcode

Either:

root # dmesg | grep microcode

or:

root # grep microcode /proc/cpuinfo

For example:

root # dmesg | grep microcode
[    0.000000] microcode: microcode updated early to revision 0x28, date = 2019-11-12
[    0.335631] microcode: sig=0x306c3, pf=0x10, revision=0x28
[    0.335730] microcode: Microcode Update Driver: v2.2.
root # grep microcode /proc/cpuinfo
microcode       : 0x28

19. Edit /var/lib/portage/world and add (or change) the specific kernel sources package version

I do this in order to ensure the command ‘emerge --depclean‘ does not remove a specific kernel’s source code during a world update. I want Portage always to install the latest (stable) version of gentoo-sources but not to delete the version of gentoo-sources that corresponds to the kernel my installation is currently using.

For example, let’s say I have just replaced a kernel built from gentoo-sources:4.19.57 with a kernel built from gentoo-sources:4.19.66. My world file would initially contain the following:

[...]
sys-kernel/gentoo-sources
sys-kernel/gentoo-sources:4.19.57
[...]

If, following a successful reboot with kernel 4.19.66, I want to delete the files for kernel 4.19.17 in /boot/ (System.map-4.19.17-gentoo, config-4.19.17-gentoo and vmlinuz-4.19.17-gentoo) and to edit the file /boot/grub/grub.cfg to remove the menu entries for kernel 4.19.57, I would change the world file’s contents to:

[...]
sys-kernel/gentoo-sources
sys-kernel/gentoo-sources:4.19.66
[...]

On the other hand, if, following a successful reboot, I want to keep the files for both kernel 4.19.17 and kernel 4.19.66, I would change the world file’s contents to:

[...]
sys-kernel/gentoo-sources
sys-kernel/gentoo-sources:4.19.57
sys-kernel/gentoo-sources:4.19.66
[...]

Browsing a WebDAV share in Linux and Windows 10

In this post I explain how I configured my machines running two Linux distributions (Gentoo Linux and Lubuntu 20.10) and my Windows 10 test machine to enable me to browse a shared folder on my file server (running ownCloud, in my case) that uses the WebDAV protocol. I cover two options for configuring Linux to browse WebDAV shares. Further options exist in Linux, but the two methods I give here are fine for my purposes.

I installed ownCloud on my Linux server in a slightly different way to the method in the ownCloud installation manual, and my examples in this post use the URI https://fitzcarraldo.ddns.net/owncloud/remote.php/webdav rather than the usual https://fitzcarraldo.ddns.net/remote.php/webdav for ownCloud, so replace the URI in my examples with the appropriate URI in your case. The username of the user account on each client machine is ‘fitz’, and the ownCloud username (davusername) on the server is ‘bsf’. Obviously replace those with the usernames in your case.

PART 1 – LINUX

Unless I mention the distribution explicitly, the following steps apply to both Linux distributions. As my Gentoo Linux installations use KDE, the steps for Gentoo Linux assume the file manager is Dolphin. My Lubuntu installation uses the file manager PCManFM-Qt.

1. Install davfs2 if it is not already installed

Gentoo Linux:

root # emerge davfs2

That command installs three packages:

acct-group/davfs2
acct-user/davfs2
net-fs/davfs2

Lubuntu 20.10:

user $ sudo apt install davfs2

2. Lubuntu 20.10: Allow mounting by non-root users

user $ sudo dpkg-reconfigure davfs2

   Package configuration
   
    ┌──────────────────────────────────────────┤ Configuring davfs2 ├───────────────────────────────────────────┐
    │                                                                                                           │
    │ The file /sbin/mount.davfs must have the SUID bit set if you want to allow unprivileged (non-root) users  │
    │ to mount WebDAV resources.                                                                                │
    │                                                                                                           │
    │ If you do not choose this option, only root will be allowed to mount WebDAV resources. This can later be  │
    │ changed by running 'dpkg-reconfigure davfs2'.                                                             │
    │                                                                                                           │
    │ Should unprivileged users be allowed to mount WebDAV resources?                                           │
    │                                                                                                           │
    │                               <Yes>                                  <No>                                 │
    │                                                                                                           │
    └───────────────────────────────────────────────────────────────────────────────────────────────────────────┘

(Do not do anything in Gentoo Linux; the SUID bit should be set automatically.)

3. Check the SUID bit has been set (notice the ‘s’ in the file’s permissions)

Gentoo Linux:

user $ ls -la /sbin/mount.davfs
lrwxrwxrwx 1 root root 21 Sep 25 23:03 /sbin/mount.davfs -> /usr/sbin/mount.davfs
user $ ls -la /usr/sbin/mount.davfs
-rws--x--x 1 root root 130752 Sep 25 23:03 /usr/sbin/mount.davfs

If the SUID bit has not be set automatically, you can do it manually:

user $ sudo chmod u+s /usr/sbin/mount.davfs

Lubuntu 20.10:

user $ ls -la /sbin/mount.davfs
-rwsr-xr-x 1 root root 137464 Aug  8  2020 /sbin/mount.davfs

4. Add the user to the davfs2 group

user $ sudo usermod -aG davfs2 fitz

Logout and login again and check the user is a member of the group:

user $ groups | grep -q davfs2 && echo "OK"
OK

5. Leave the lines in the following files commented out (i.e. accept the defaults)

/etc/davfs2/davfs2.conf (system-wide)

~/.davfs2/davfs2.conf (user-specific)

6. Option 1 (simplest!) – Enter the URI in the file manager and bookmark it

6.1 Gentoo Linux with KDE

Enter the following URI on the Dolphin file manager’s address line and press Enter:

webdavs://fitzcarraldo.ddns.net/owncloud/remote.php/webdav

You will be prompted to enter the username and password for the WebDAV share.

Select ‘File’ > ‘Add to Places’ in Dolphin to bookmark the share. From then on, you can browse the share by clicking on the share in the Remote section in Dolphin’s Places pane. You can rename the bookmark if you wish (right-click and select ‘Edit…’).

Another way to do this in KDE is as follows:

  1. click on ‘Network’ in the Places pane;
  2. click on ‘Add Network Folder’ next to the address bar;
  3. select ‘WebFolder (webdav)’ and click ‘Next’;
  4. enter the fields as follows:
    • Name: webdav
    • User: bsf
    • Server: fitzcarraldo.ddns.net
    • Port: 443 (I use Port 443 but you may be using a different port)
    • Folder: owncloud/remote.php/webdav
  5. select ‘Create an icon for this folder’ and ‘Use encryption’;
  6. click ‘Save & Connect’;
  7. right-click on the webdav icon in the main Dolphin pane and select ‘Add to Places’.

6.2 Lubuntu 20.10

Enter the following URI on the PCManFM-Qt file manager’s address line and press Enter:

davs://fitzcarraldo.ddns.net/owncloud/remote.php/webdav

You will be prompted to enter the username and password for the WebDAV share.

Select ‘Bookmarks’ > ‘Add to Bookmarks’ in PCManFM-Qt to bookmark the share. From then on, you can browse the share by clicking on the share in the Bookmarks section in PCManFM-Qt’s Lists pane. You can rename the bookmark if you wish (Bookmarks > Edit Bookmarks).

7. Option 2 – Assign a mountpoint at boot:

Add the following credentials line in the file ~/.davfs2/secrets:

https://fitzcarraldo.ddns.net/owncloud/remote.php/webdav <davusername> <davpassword>

and set the file permissions as follows:

user $ chmod 600 ~/.davfs2/secrets

Create a user directory onto which to mount the share:

user $ mkdir ~/webdav

Add a line in /etc/fstab to map the WebDAV share onto that directory at boot:

# <file system>                                            <mount point>       <type>  <options>        <dump>  <pass>
https://fitzcarraldo.ddns.net/owncloud/remote.php/webdav   /home/fitz/webdav   davfs   noauto,user,rw   0       0

The options ‘auto‘ and ‘_netdev‘ do not mount the WebDAV share automatically at boot in my installations; I am prompted to enter the davuser and davpassword manually early in the boot process if I include those options. To avoid the latter I use the ‘noauto‘ option and do not bother including the ‘_netdev‘ option. There are ways to mount a WebDAV share automatically at boot whether your installation uses systemd, OpenRC or other rc systems. Nevertheless I prefer the WebDAV share not to be mounted auomatically at boot, especially in the case of my laptops.

Reboot to check everything works.

Lubuntu 20.10:

The share will be listed as ‘webdav’ (unmounted) in the Devices section under Lists in PCManFM-Qt. You can click on the unmounted share to mount it, and click on the Unmount icon to unmount it. Everything works as expected.

Gentoo Linux with KDE:

The share is not listed in the Places pane in Dolphin but the share can be mounted manually from the command line as follows:

user $ mount ~/webdav
/sbin/mount.davfs: warning: the server does not support locks

(The ‘user‘ option in /etc/fstab allows the non-root user to mount the share.)

The main pane displaying the contents of ~/webdav/ will only be populated with the contents of the remote folder after the share is mounted.

The share is browsable in Dolphin. I can perform all file and folder operations in KDE apart from one thing: I cannot copy files to the server (neither from the local machine nor from the server); Dolphin displays messages such as ‘There is not enough space on the disk to write file:///home/fitz/testfile.txt’. I suspect the problem is with KDE, because I can copy files to and on the share by using the command line (for example the commands ‘cp ~/test1.txt ~/webdav/‘ and ‘cp ~/webdav/test2.txt ~/webdav/test3.txt‘ work fine). I have yet to find a solution to this issue, so I use Option 1 for Gentoo Linux running KDE, which works fine. To create a bookmark in Dolphin’s Places pane, browse the share and select ‘File’ > ‘Add to Places’.
 
PART 2 – WINDOWS 10

There is a Map Network Drive Wizard, but it is not as straightforward for WebDAV shares as it is with SMB shares. See the thread Cannot connect to webdav service for the type of behaviour I experienced, althought in my case I could rarely establish a connection using either ‘Map network drive’ or ‘Add a network location’, and the mapping was always lost if I logged out or rebooted, despite selecting ‘Reconnect at sign-in’. I then discovered several invalid URIs in Registry keys. Presumably these were left in the Registry after my various unsuccessful configuration attempts using the wizard. To finally succeed in mapping the ownCloud WebDAV shared folder I had to search for the string ‘fitzcarraldo.ddns.net’ in the Registry (see Steps 1 & 2 below for how to open the Registry) and delete any existing strings similar or identical to ‘https://fitzcarraldo.ddns.net/ownloud/remote.php/webdav‘, as they seemed to interfere with successful mapping of the network directory.

After making sure the Registry no longer contained any incorrect-looking WebDAV URIs for my ownCloud server, I used the following steps:

  1. Right-click on Windows’ Start Menu icon on the left of the Task Bar and select ‘Run’.
  2. Enter ‘regedit’ in the Open box and click ‘OK’.
  3. Select Computer\HKEY_LOCAL_MACHINE\SYSTEM\CurrentControlSet\Services\WebClient\Parameters
  4. If the value in BasicAuthLevel is not already 2, change it to 2.
  5. In the ‘Type here to search’ box on the Task Bar, enter ‘Services’ and press Enter.
  6. Click ‘Services App’.
  7. Scroll down to ‘WebClient’ in the Services window.
  8. Right-click ‘WebClient’ and select ‘Properties’.
  9. If ‘Startup type’ is not already set to ‘Automatic’, change it to ‘Automatic’ and click ‘Apply’.
  10. Launch File Explorer.
  11. Right-click ‘This PC’ and select ‘Map network drive…’.
  12. Select the drive letter (default is Z:).
  13. In the Folder box enter \\fitzcarraldo.ddns.net@SSL\owncloud\remote.php\webdav and make sure only ‘Reconnect at sign-in’ is ticked.
  14. Click ‘Finish’.
  15. A network icon and the label ‘webdav (\\fitzcarraldo.ddns.net@SSL\owncloud\remote.php) (Z:)’ should appear under ‘My PC’. Clicking that icon displays the contents of the shared folder of my ownCloud account on my server.

The only Registry entries containing ‘fitzcarraldo.ddns.net’ found by ‘Edit’ > ‘Find…’ are now the following:

Computer\HKEY_CURRENT_USER\Network\Z
RemotePath     REG_SZ     \\fitzcarraldo.ddns.net@SSL\owncloud\remote.php\webdav

Computer\HKEY_CURRENT_USER\SOFTWARE\Microsoft\Windows\CurrentVersion\Explorer\Map Network Drive MRU
a     REG_SZ     \\fitzcarraldo.ddns.net@SSL\owncloud\remote.php\webdav

Computer\HKEY_CURRENT_USER\SOFTWARE\Microsoft\Windows\CurrentVersion\Explorer\MountPoints2\##fitzcarraldo.ddns.net@SSL#owncloud#remote.php#webdav
LabelFromReg     REG_SZ     webdav (\\fitzcarraldo.ddns.net@SSL\owncloud\remote.php)

Computer\HKEY_CURRENT_USER\SOFTWARE\Microsoft\Windows\CurrentVersion\Explorer\PublishingWizard\AddNetworkPlace\AddNetPlace\LocationMRU
a     REG_SZ     https://fitzcarraldo.ddns.net/owncloud/remote.php/webdav

Computer\HKEY_USERS\S-1-5-21-4039722433-590489090-552845671-1001\Network\Z
RemotePath     REG_SZ     \\fitzcarraldo.ddns.net@SSL\owncloud\remote.php\webdav

Computer\HKEY_USERS\S-1-5-21-4039722433-590489090-552845671-1001\SOFTWARE\Microsoft\Windows\CurrentVersion\Explorer\Map Network Drive MRU
a     REG_SZ     \\fitzcarraldo.ddns.net@SSL\owncloud\remote.php\webdav

Computer\HKEY_USERS\S-1-5-21-4039722433-590489090-552845671-1001\SOFTWARE\Microsoft\Windows\CurrentVersion\Explorer\MountPoints2\##fitzcarraldo.ddns.net@SSL#owncloud#remote.php#webdav
LabelFromReg     REG_SZ     webdav (\\fitzcarraldo.ddns.net@SSL\owncloud\remote.php)

Computer\HKEY_USERS\S-1-5-21-4039722433-590489090-552845671-1001\SOFTWARE\Microsoft\Windows\CurrentVersion\Explorer\PublishingWizard\AddNetworkPlace\AddNetPlace\LocationMRU
a     REG_SZ     https://fitzcarraldo.ddns.net/owncloud/remote.php/webdav

 
CONCLUSION

There you have it. I can browse my ownCloud user account folders on my server from my machines running Linux and from my test machine running Windows 10.

Installing and configuring davfs2 in Linux, and using Option 1 to browse a WebDAV share is very easy in both Gentoo Linux running KDE and in Lubuntu 20.10. Using Option 2 is also very easy in Lubuntu 20.10 but is not easy in Gentoo Linux running KDE, and I still need to find out if there is a better approach for Option 2 in Gentoo Linux running KDE.

I found Windows 10 the most problematic, despite the apparent simplicity of the ‘Map network drive’ and ‘Add a network location’ wizards. I discovered that, if I didn’t get the format of the URI correct the first time, Windows 10 would leave ‘cruft’ in the Registry that apparently prevented further mapping attempts from working properly and consistently.

Anyway, everything works the way I want and I hope this post is of some help to others wanting to browse a share using WebDAV, be that a folder in ownCloud, Nextcloud or any other network service requiring the WebDAV protocol.

Removing PipeWire in Gentoo Linux

PipeWire, all the rage these days, was originally developed for video but was later enhanced to support audio as well, and is now an alternative to PulseAudio and JACK. My laptop running Gentoo Stable (amd64) with the KDE Plasma Desktop had been working fine with PipeWire for some time. The pulseaudio and screencast USE flags were both declared in the file /etc/portage/make.conf. Both audio playback and recording worked fine until a recent upgrade of the packages in my world file, when neither worked any more. The Audio Volume loudspeaker icon (the applet kde-plasma/plasma-pa) on the KDE Plasma panel had a red line through it, and the KMix loudspeaker icon (the applet kde-apps/kmix) on the panel was greyed out. Although I cannot be sure, I suspect the problem started when the first version of PipeWire that supported audio was released. The output of the command ‘ps -ef | grep pulse‘ showed me that both PulseAudio and PipeWire were running. At the time I did not know that PulseAudio is not supposed to be running at the same time as PipeWire. Sometimes when I booted the laptop and logged in, the loudspeaker icons on the Panel would appear correctly and audio output would work properly, but usually this was not the case. This behaviour made me wonder if there was some sort of race condition between the two applications at startup.

Anyway, I stopped PulseAudio being launched automatically at startup. I did this by editing the file /etc/pulse/client.conf to add the line ‘autospawn = no‘ (a comment in the as-installed file indicates that the default value for autospawn is ‘yes‘). That did indeed stop PulseAudio from being launched automatically, and left only PipeWire running. The loudspeaker icons were then displayed correctly on the Panel when I logged in to the KDE Plasma Desktop, and audio output then worked. However, PipeWire did not detect the laptop’s built-in microphone, and no Recording channel was displayed by KMix and Audio Volume. The troubleshooting chapter of the Arch Linux Wiki article on PipeWire has a section suggesting a couple of fixes for this problem (Microphone is not detected by PipeWire) but, even so, I decided to ditch PipeWire and revert to PulseAudio. As much as I dislike PulseAudio (see some of my previous posts on the various problems I have experienced with it), these days it is more or less stable on this laptop and I do not have to mess around too much with audio settings.

A few KDE packages in Gentoo Linux depend on PipeWire (they require the screencast USE flag to be set). I therefore added the following two entries to a file in the directory /etc/portage/package.use/ in order to stop PipeWire being required:

>=sys-apps/xdg-desktop-portal-1.8.1 -screencast
>=kde-apps/krfb-20.12.3 -wayland

I was then able to use the usual command ‘emerge -uvDN @world‘, followed by the command ‘emerge --ask --depclean‘, to rebuild the affected packages and remove PipeWire. I also deleted the line ‘autospawn = no‘ that I had previously added to the file /etc/pulse/client.conf, so that PulseAudio would again be launched automatically at startup. Audio playback and recording are now back to normal. I will probably try PipeWire again in the future but, for the moment, I don’t need it. According to the Gentoo Linux Wiki article on PipeWire:

Warning
As of mid 2021, PipeWire is still in active development and not everything is fully integrated, tested, or implemented – though the project is moving along. While replacing existing audio solutions on Gentoo is possible, the experience is currently not guaranteed to be perfect or free of issues and bugs.

I will therefore wait until the concensus amongst Gentoo Linux users is that PipeWire is trouble-free before I try it again.

croc – another file transfer method

I have lost count of the number of times I have had to send a large file to someone at work, usually in a hurry. I’ve used Dropbox, ownCloud, Firefox Send (no longer available) etc. Transferring large files became a bit easier when e-mail service providers increased the size limit for attachments, but that is still not a solution for very large files. The xkcd cartoon FILE TRANSFER sums up the situation nicely.

I recently discovered the command line utility croc, which the author claims is a way to ‘easily and securely transfer stuff from one computer to another.’ I thought I’d give it a try, if only to have another tool to fall back on in an emergency. It does rely on both ends having croc installed, but hopefully that should not be a show-stopper as croc is available for Linux, Windows, macOS and BSD. To quote the author:

croc differs from a utility like scp because it doesn’t require any two computers to have enabled port-forwarding. Instead, croc will uses a relay – a temporary server setup locally (if both computers are on lan) or publicly (default is at croc4.schollz.com). Any two computers can connect to the relay, and after securing their channel with PAKE [password authenticated key exchange], they can transfer encrypted metadata and data through the relay. The relay works by first having the computers communicate the PAKE protocol via websockets, and then exchanging encrypted metadata, and then stapling the TCP connections directly so that they can transfer directly.

So, to use croc you will be dependent on the public relay provided by the author unless you set up your own relay (instructions are provided in the author’s original 2018 blog post introducing croc – see link above – and in various third-party articles about croc, such as ‘Securely Transfer Files and Folders Between Computers Using Croc‘ and ‘Transfer Files And Folders Between Computers With Croc‘).

Anyway, I installed croc in Lubuntu and Gentoo Linux from the author’s GitHub repository and indeed it is easy to use and works fine. The binary releases for the various OSs and Linux distributions can be found on the Releases page of the GitHub repository or via the OS package manager.

Lubuntu 20.10:

user $ wget https://github.com/schollz/croc/releases/download/v9.1.6/croc_9.1.6_Linux-64bit.deb
user $ sudo dpkg -i croc_9.1.6_Linux-64bit.deb

Gentoo Linux:

root # emerge net-misc/croc

(Note that croc ebuilds are not currently marked as Stable in the Gentoo Linux Portage tree, so you’ll have to unmask them by keyword if you are using the Stable branch.)

Termux:

I even installed croc in Termux on my Samsung Galaxy Note 20 Ultra 5G, and it works in Android too:

$ pkg install croc

Other OSs and other Linux distributions:

See the instructions in the README file online.

Using croc

Using croc is as simple as entering a command on one computer, informing (via e-mail, telephone, SMS, Signal or other social media) the person using the other computer of the command to use, and entering that command on the other computer. For example:

Sender

user $ croc send Documents/flight-times.ods
Sending 'flight-times.ods' (16.6 kB)
Code is: 8878-salary-courage-roger
On the other computer run

croc 8878-salary-courage-roger

Receiver

user $ croc 8878-salary-courage-roger
Accept 'flight-times.ods' (16.6 kB)? (Y/n) 

If the receiving user then enters ‘Y’, the sending user sees something similar to this:

user $ croc send Documents/flight-times.ods
Sending 'flight-times.ods' (16.6 kB)
Code is: 8878-salary-courage-roger
On the other computer run

croc 8878-salary-courage-roger

Sending (->192.168.1.74:60740)
 100% |████████████████████| (17/17 kB, 10.918 MB/s)
user $ 

and the receiving user sees something similar to this:

user $ croc 8878-salary-courage-roger
Accept 'flight-times.ods' (16.6 kB)? (Y/n) Y

Receiving (<-[::1]:39442)
 100% |████████████████████| (17/17 kB, 3.989 MB/s)
user $ 

The observant reader will notice that the above example shows a file being transferred on the same computer. When transferred between different computers the IP addresses of each computer will be displayed instead. I have used croc to transfer files between different computers on my home network (I would normally just use my NAS for this, though), between remote computers on the Internet, and between my computers and my phone via mobile broadband, and croc works in all cases.

I have not mentioned all croc’s features. I’ll leave you to read up on croc in more detail in the links I’ve given above. It looks like it might be a useful tool to have installed.

Using adb tools in Linux to remove bloatware from my Samsung Galaxy Note 20 Ultra

Samsung included a lot of bloatware on my Galaxy Note 20 Ultra 5G, and it is not possible to uninstall it using Play Store. However, it is possible to remove this stuff using adb tools. I got rid of the bloatware I don’t want very easily using the Linux version of the adb tools.

I have never had a Facebook account and never will, so I decided to remove all trace of it as follows:

1. Installed adb tools

In Lubuntu 20.10:

user $ sudo apt install android-tools-adb

In Gentoo Linux:

root # emerge dev-util/android-tools

2. Enabled ‘Developer Options’ on the phone

‘Settings’ > ‘About Phone’ > ‘Software Information’ and quickly tapped 7 times on ‘Build number’.

3. Enabled USB Debugging on the phone

‘Settings’ > ‘Developer options’, scrolled down and tapped on ‘USB debugging’.

4. Launched adb

user $ adb start-server
* daemon not running; starting now at tcp:5037
* daemon started successfully

5. Connected the phone to the computer using the USB cable

A few prompts on the phone asked whether or not I wanted to allow USB debugging. Tapped ‘Always allow from this computer’ and tapped ‘OK’.

6. Uninstalled Facebook

The packages I needed to uninstall were:

com.facebook.appmanager
com.facebook.katana
com.facebook.services
com.facebook.system

First I tried to uninstall with the ‘-k‘ option:

user $ adb uninstall -k --user 0 com.facebook.appmanager
The -k option uninstalls the application while retaining the data/cache.
At the moment, there is no way to remove the remaining data.
You will have to reinstall the application with the same signature, and fully uninstall it.
If you truly wish to continue, execute 'adb shell cmd package uninstall -k'.

See ‘Difference between pm clear and pm uninstall -k on Android

I have never been a member of Facebook and never will, so I dispensed with the ‘-k‘ option and entered the following commands:

user $ adb uninstall --user 0 com.facebook.appmanager
Success
user $ adb uninstall --user 0 com.facebook.katana
Success
user $ adb uninstall --user 0 com.facebook.services
Success
user $ adb uninstall --user 0 com.facebook.system
Success

I didn’t want the LinkedIn, Samsung Global Goals and Spotify apps either, so I uninstalled those too:

user $ adb uninstall --user 0 com.linkedin.android
Success
user $ adb uninstall --user 0 com.samsung.sree
Success
user $ adb uninstall --user 0 com.spotify.music
Success

7. Stopped the adb server on the computer

user $ adb kill-server

8. Unplugged the phone from the computer.

That’s it.

In order to disable the apps using this method, you will need to know the exact package name of the app you want to get rid of. For this, use Play Store and install App Inspector (there are several apps with this name in Play Store; I installed the app by Projectoria Ltd but the others look OK too). Launch App Inspector and you can find the package name under the name of the app. This starts with a ‘com‘ or ‘net‘ followed by words separated by dots.

For example, App Inspector shows the package name for LinkedIn as ‘com.linkedin.android‘.

Some useful links:

To get a list of all the packages installed on my phone:

user $ adb shell pm list packages

To get a list of system apps only:

user $ adb shell pm list packages -s

To get a list of only Samsung packages:

user $ adb shell pm list packages | grep samsung

To search for e.g. facebook packages:

user $ adb shell pm list packages | grep facebook

(Returns nothing now, as I already deleted all the Facebook packages. Yay!)

To search for other packages, e.g.:

user $ adb shell pm list packages | grep kids
package:com.samsung.android.kidsinstaller
package:com.sec.android.app.kidshome